What does it cost to Furnish an Airbnb?
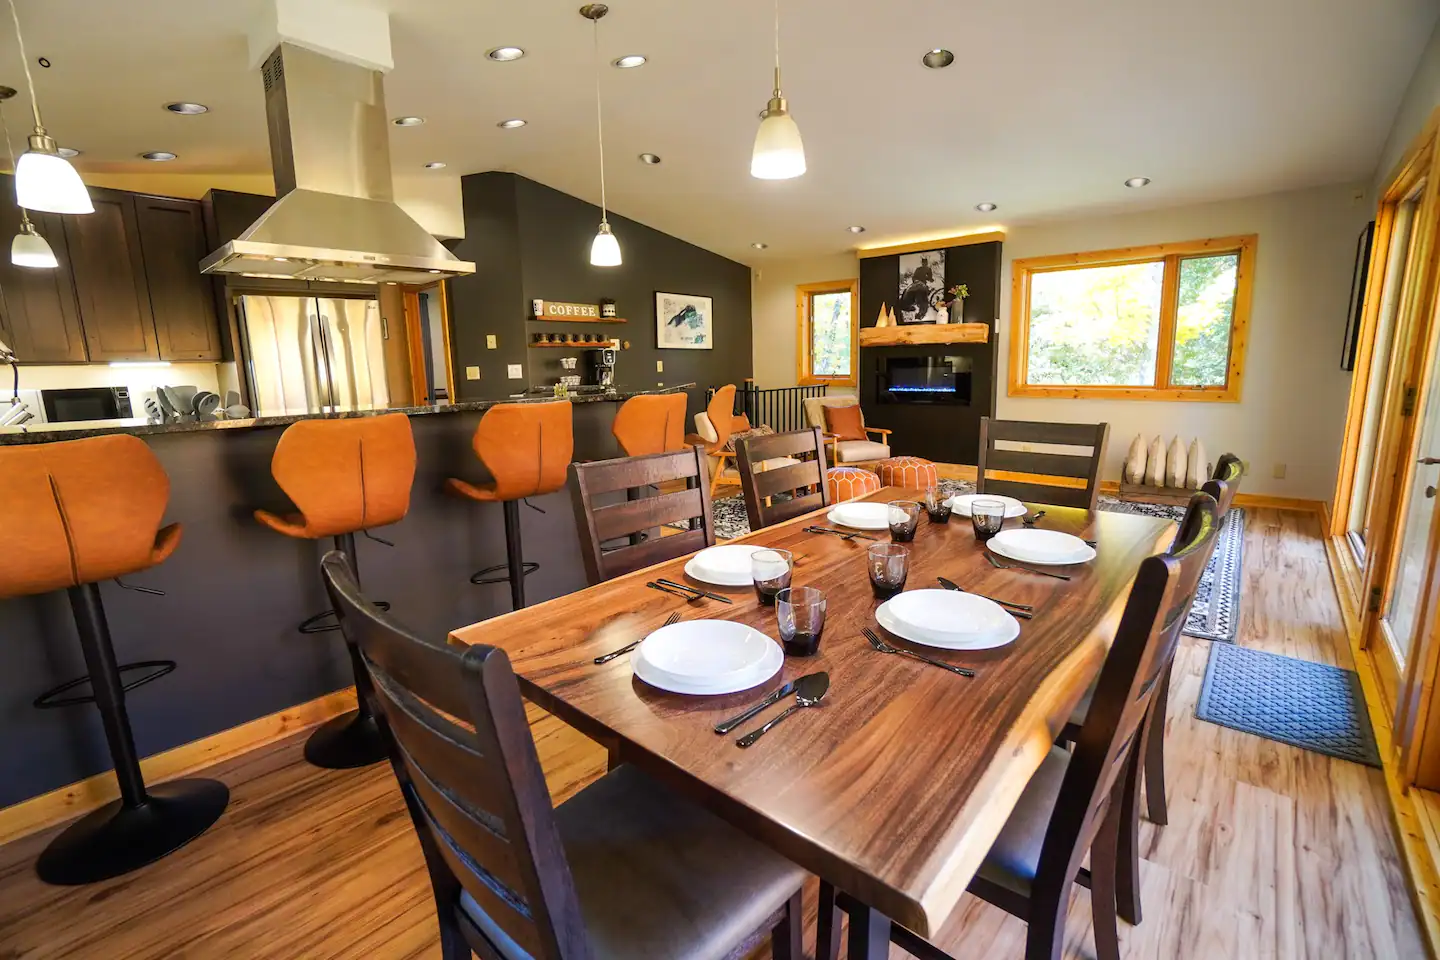
Calculating the cost of furnishing your new Airbnb will depend on a number of factors such as the size of the space, the style and quality of furniture you choose, and the location of your property. Here are some steps to help you figure out the cost of furnishing your Airbnb:

  1. Determine the size of your space: The first step is to determine the size of your Airbnb. This will help you decide how much furniture you need and how much space you have to work with.
  2. Make a list of necessary furniture: Make a list of all the furniture you need to furnish your Airbnb, including beds, dressers, nightstands, sofas, chairs, tables, and lamps. I have a spreadsheet to help you do this, but more on that later.
  3. Research furniture prices: Do some research to find out the average cost of the furniture you need. Check out furniture stores, online retailers, and secondhand furniture shops to get an idea of the price range.
  4. Set a budget: Determine how much you are willing to spend on furnishing your Airbnb. This will help you prioritize your purchases and make sure you don’t overspend. You may wish to understand on some items so you can overspend on items you think are really worth it.
  5. Factor in additional costs: Don’t forget to factor in additional costs such as delivery fees, assembly fees, and taxes. We bought a cabin in a remote area, some items were not deliverable to the address so we had to get them shipped to our home and then bring them in ourselves.
  6. Consider the location of your property: If your Airbnb is located in a touristy area, you may need to invest in high-quality, stylish furniture to attract guests. If your Airbnb is in a more rural or less popular area, you may be able to get away with more basic furniture. Consider if you want your furniture & decor to be part of your competitive edge against other options in your local market.
  7. Start shopping: Once you have a good idea of what you need and how much you are willing to spend, start shopping around for furniture. Be sure to compare prices and quality before making any purchases. We opted for higher quality in major pieces. Which for us meant no Ikea furniture, frames and decor, sure, but not for any large items, like furniture or statement pieces.

Overall, furnishing your Airbnb can be a significant investment (Thousands of dollars), but it’s an important part of creating a comfortable and inviting space for your guests. By doing your research, setting a budget, and shopping smart, you can create a beautiful space without breaking the bank.

One of the best compliments I ever received from a guest:

“…will definitely be leaving good reviews. Our stay was great and I even snapped some pictures of the decor for some inspiration for our home. Well done to whoever designed and decorated! Thanks again!”

That comment made all the hard work worth it to me. 

A Rule of Thumb – Cost Per Square Foot

If you’re looking for a rough idea you can use some “back-of-the-napkin” math to set your budget. A simple rule of thumb is to use a cost-per-square-foot rule of thumb.

Let’s say you have a 1,500 square foot house. If want to spend in the range of $15-$20 per square foot, that puts you in the range of $22,500 to $30,000 to furnish your short-term rental.

The drawback, this rule of thumb doesn’t tell us much about the house. Is it 1 bedroom or is it 4? 1 bathroom or 3? Is there a large deck and patio space that needs to be furnished or does the home lack outdoor living areas? That’s why it’s a rule of thumb, all thumbs vary so it is not exact, but it can be a helpful start.

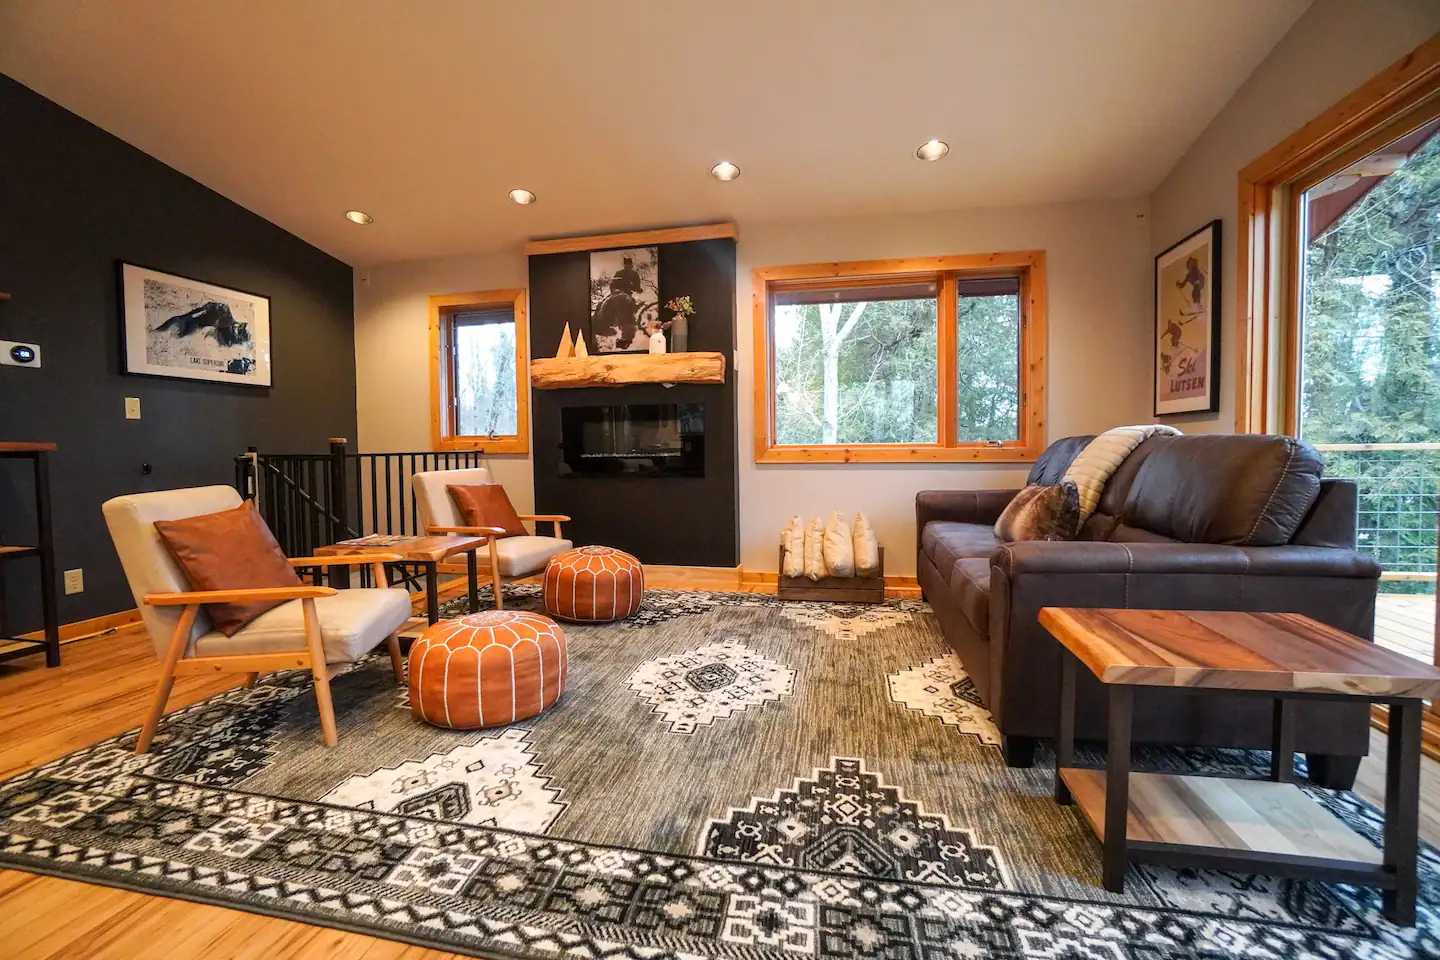
Let’s put it to the test. I bought a cabin that has 1,532 finished square feet. (it also has an outdoor deck, think, more living area that we need to furnish).

We actually spent $17,285.94 on furnishing the property. The math pans out to $11.28 per square foot.

It’s important to give you some more figures in that number:

  • We aimed for higher quality items for most things. We bought things that are way nicer than what we have in our own house.
  • As a carpenter, I built much of the furniture myself. Things like end-tables, nightstands, desks, coat racks, benches, a coffee bar, and the dining room table.  So our cost, would have been much higher if we had to buy those items. Instead, I paid for the cost of materials and sacrificed my own time.
  • We added minimal outdoor furniture as part of our initial cash outlay. We launched the property in mid-October, no sense in buying some nice patio furniture just to store inside for the next 6 months of a snowy winter. We’ll buy that in the spring when its more likely to be used by guests, so that cost is not in the figure above.


Property Improvement Costs

Also, it’s important to know we are talking about furnishings, property improvements are not counted in this number. That is things like repairs and upgrades we made to the physical property. Painting, staining the deck, adding site-built drainage systems, running new electrical, adding a fireplace, replacing dog-flavored-carpet, and countless other small items.

I do plan to share a Calculator for estimating property improvement costs too.

Holding Costs

You will also have holding costs. Holding costs are the cost to “hold” or own the property while you aren’t ready to rent it yet and make an income on it. The bills still need to be paid and that’s your job. The HOA dues, electric and/or gas utilities, water bill, trash service, internet, and even software products you might use for running your Airbnb/business.  And don’t forget that mortgage payment, homeowners insurance, and county taxes.

 A Tool To Help You – A Free Cost Estimator

I made a spreadsheet to calculate these things, I turned it into a template for you to use. It’s a Google sheet, so you’ll need to save your own copy and then edit that copy.

I hope it’s a helpful starting point for estimating the costs to furnish your Airbnb. You can customize it to fit your scenario, by adding more line items, adjusting the quantity or price of items, and linking to them so when you’re ready to start buying you have your whole shopping list ready. It’s no small task, you are essentially outfitting an entire household. That’s a lot of shopping so it’s best to stay very organized.

If I were more of a hype-man I might say something like:

“Are you tired of playing the guessing game when it comes to furnishing your Airbnb listing? Don’t worry, we’ve got you covered with our Airbnb furnishing cost calculator spreadsheet. It’s like having a psychic interior designer in a downloadable file!

No more stressing about how much it will cost to make your guests feel at home. Our calculator takes into account everything from cozy furniture to trendy decor, so you can get an accurate estimate without having to consult the stars.

Plus, our spreadsheet is fully customizable, so you can add your own unique items like that vintage lamp from your grandma’s attic or that quirky painting from your last vacation. Who says you can’t mix leopard print with polka dots?

With our Airbnb furnishing cost calculator spreadsheet, you can be the host with the most, without breaking the bank. So go ahead, download it now and let the good vibes roll in (and the cash too, of course).”

Here’s the Airbnb Furnishing Calculator (By Room) *

Like other things on this site it will have some affiliate links. That means by buying the recommended items I may receive a small commission on those items. This occurs at no additional cost to you and helps me underwrite the cost of producing these resources. and others. Thanks for your support. Mostly everything you’ll find linked are items we have used (or similar where exact products were no longer available) to furnish our own Airbnbs.

*I plan to update this from time to time. It’s a work in progress and I have some improvements planned, so you may want to check back here for the latest version. 


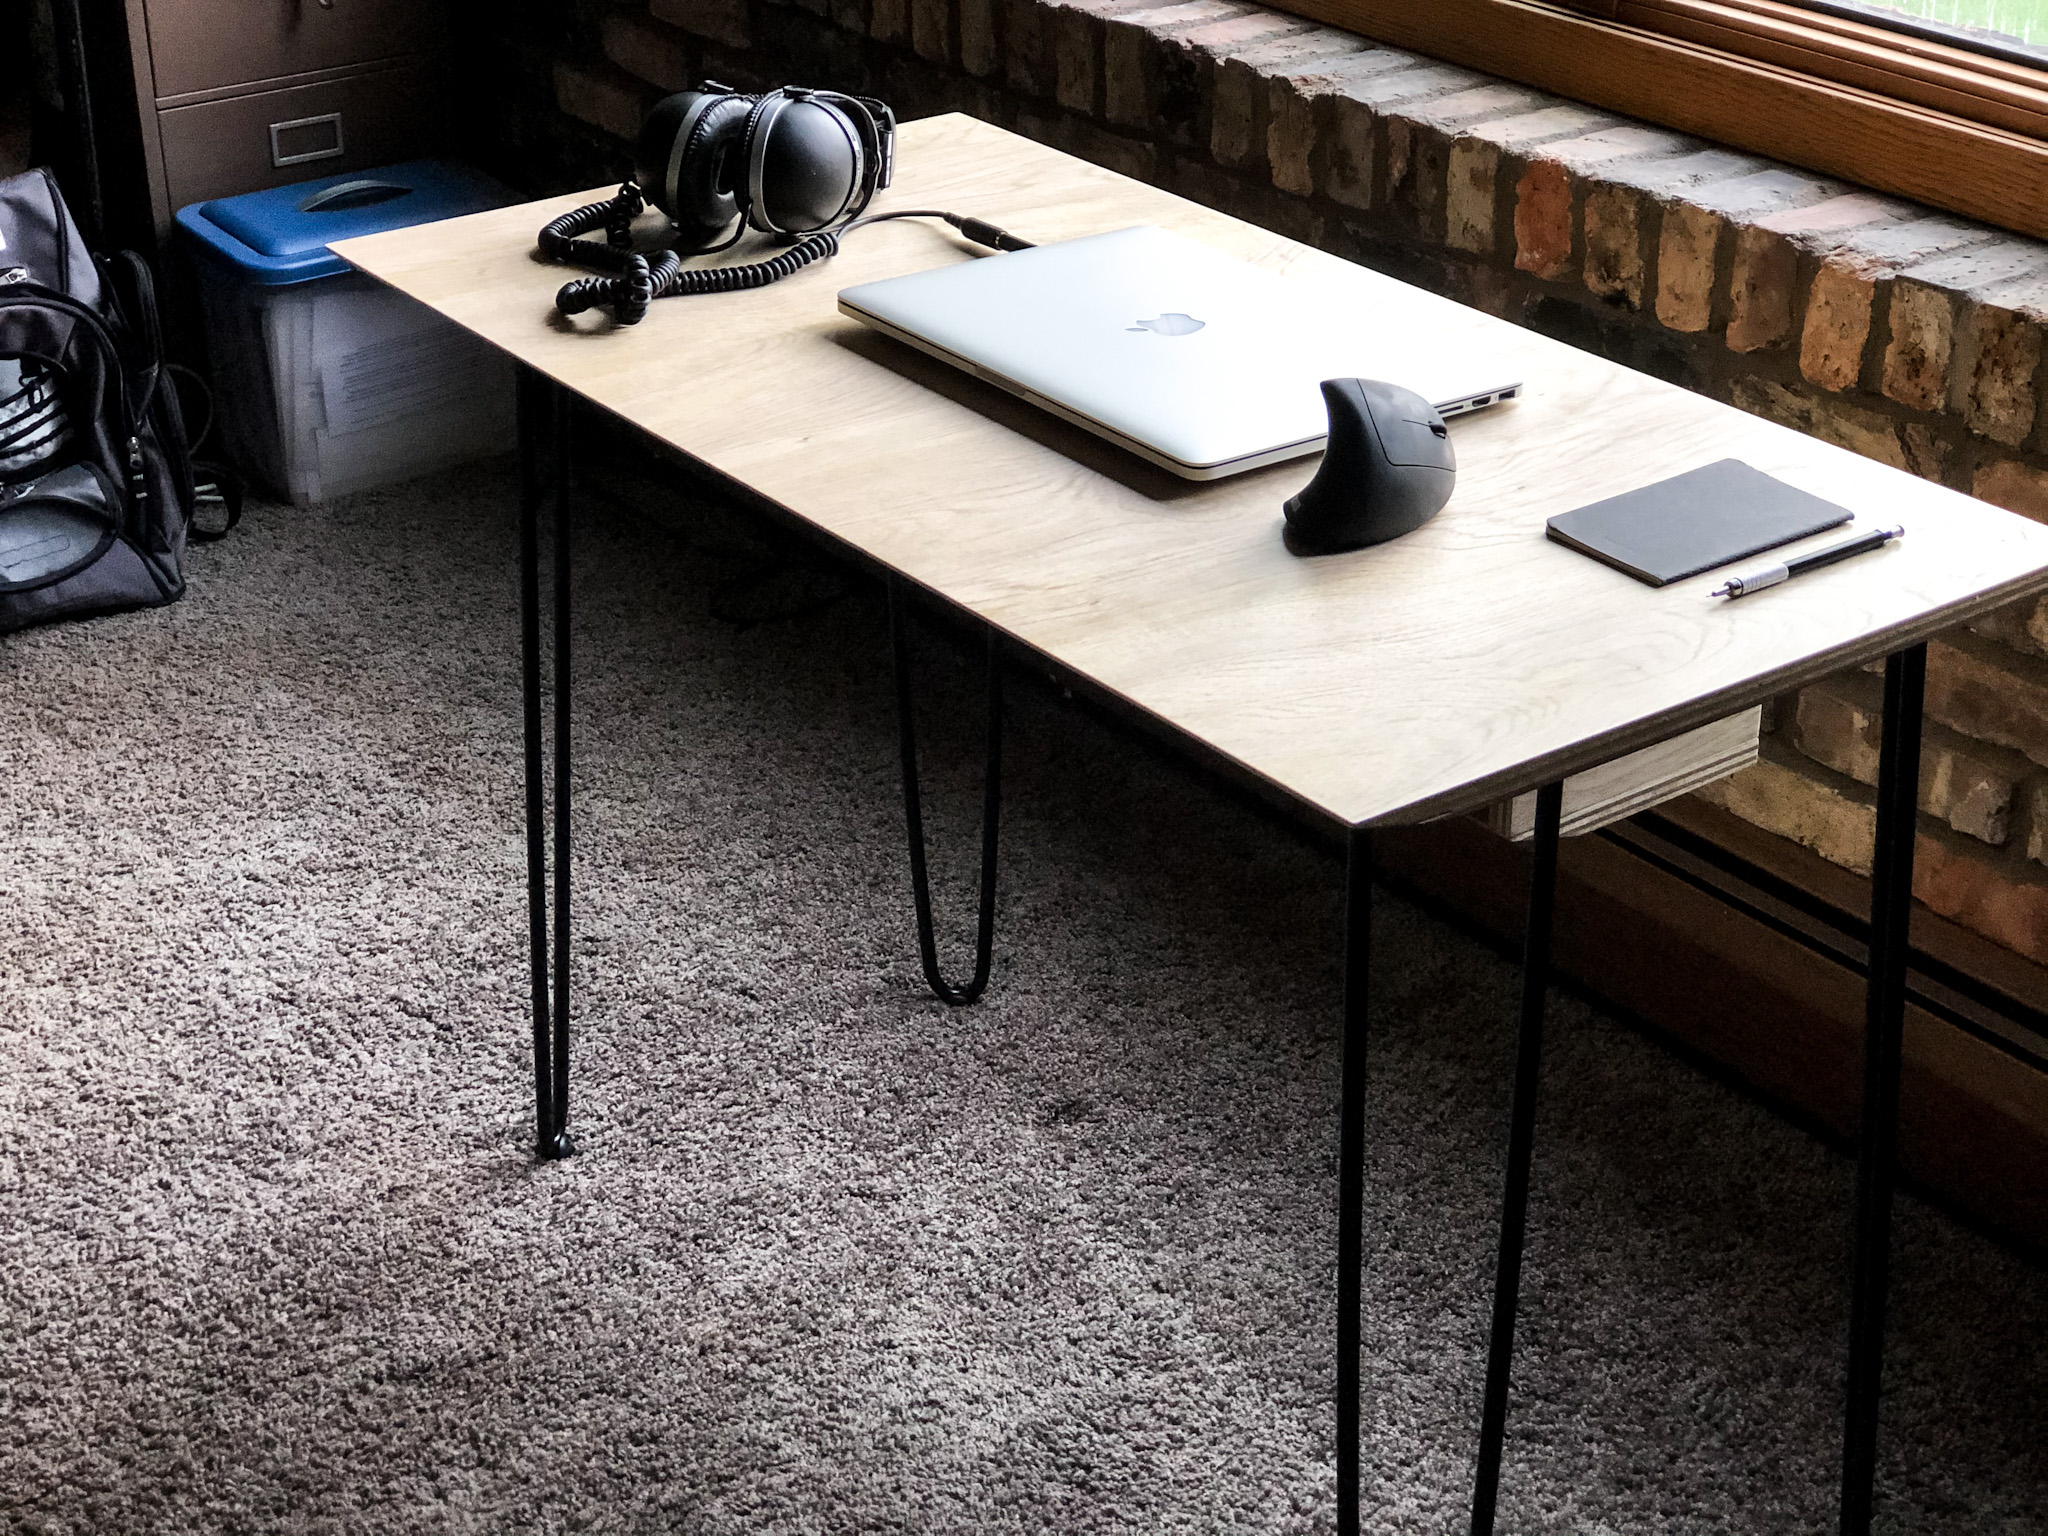
How To Build a Modern Looking Gaming Desk

For this build I decided to use Hairpin style legs which is a hallmark of Mid-Century Modern furniture. (You can see this whole build on YouTube)

Hairpin Legs have been used on a number of furniture pieces including beds, sofas, end tables, coffee tables, dressers, and coffee tables.

I’ve been wanting to use them in a project for a while now and finally got the chance to do so when my friend Cameron asked me to build this gaming desk for him.


Since hairpin legs typically attach with either screws or bolt they install quickly. Which saved me a decent amount of time on this build. Likely, this is also due to the fact they’re are now readily available commercially, so you don’t have to spend hours in front of your blacksmith forge hammering them out. 

If you’re looking to build some of your own furniture and you like the look of Hairpins, I’d recommend trying them. They’re simpler than I thought they’d be

One of the ways I’ve seen them used in design is to contrast weight. Hairpin legs are usually thin and skinny, around 3/8″ in diameter. When used to support something that appears really heavy (for example a 4″ thick walnut slab coffee table) it creates a sense that the object is “floating in the air” This is because the contrast shifts our cognitive perceptions of the realistic relationship between an object’s appearance of weight and what would be required to support it (Gravity & Structure).


In this build, I wanted to explore a different design idea. I wanted the desktop to be as thin as possible. Thinner than the Hairpin legs if I could manage it. This idea would create a different relationship between our expectations for “Gravity and Structure.”

At first, I explored different types of metal for the desktop, looking for something that could give me the strength & support while also providing the thin appearance.


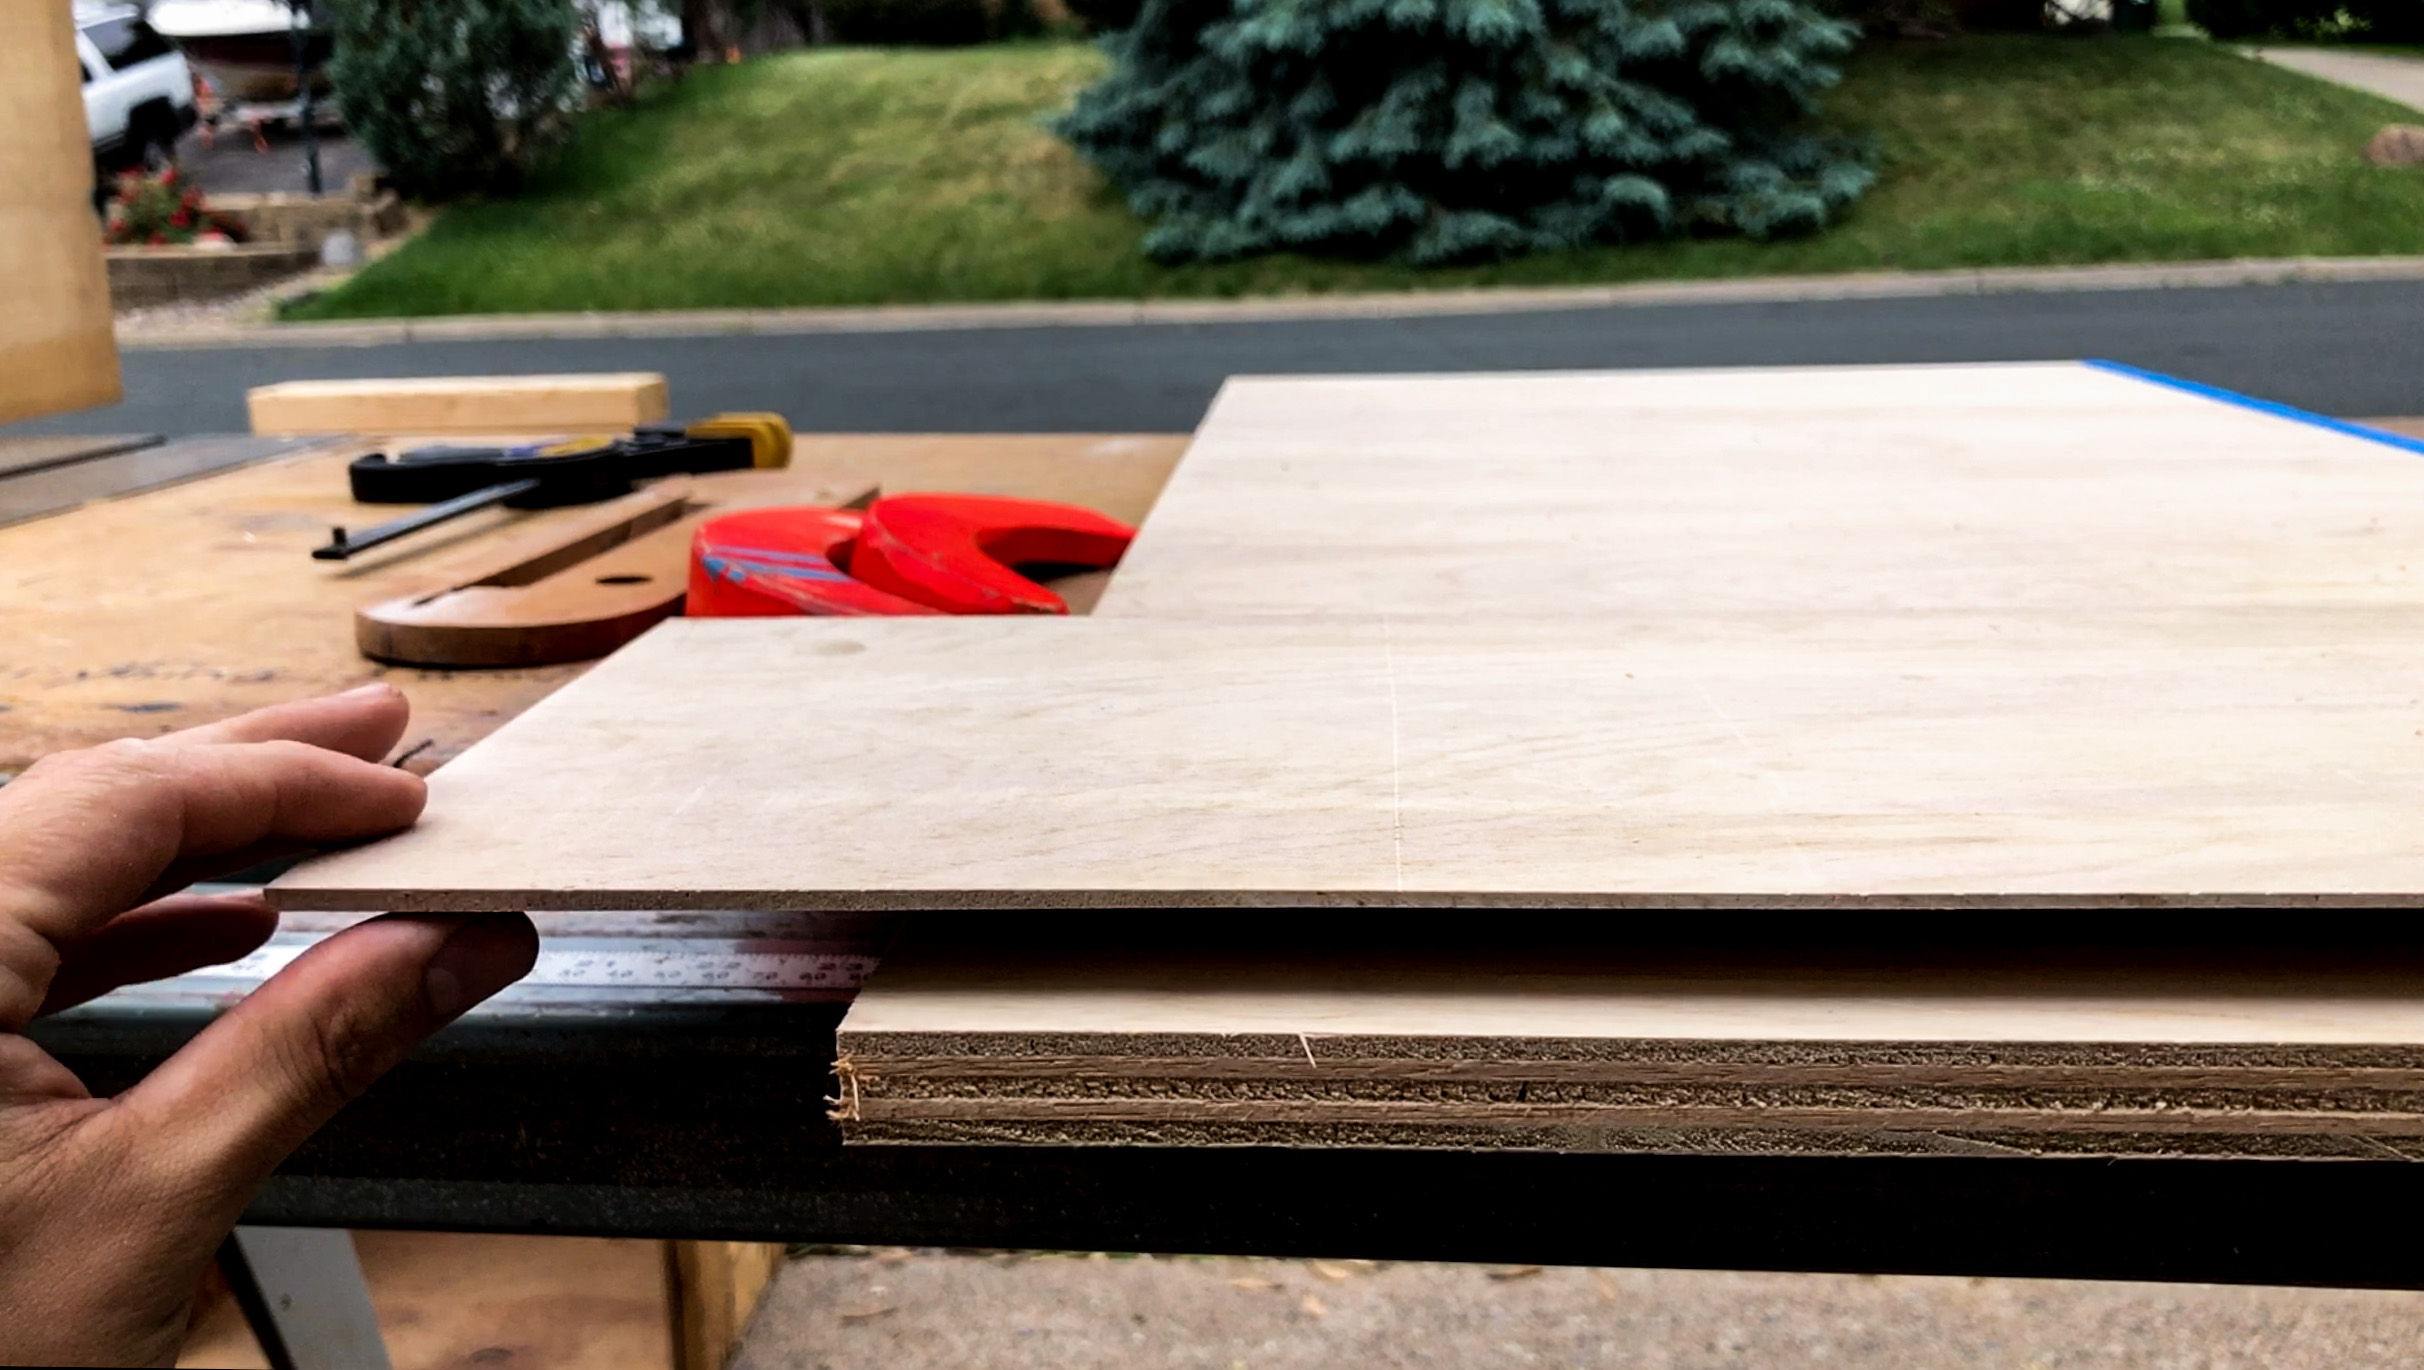
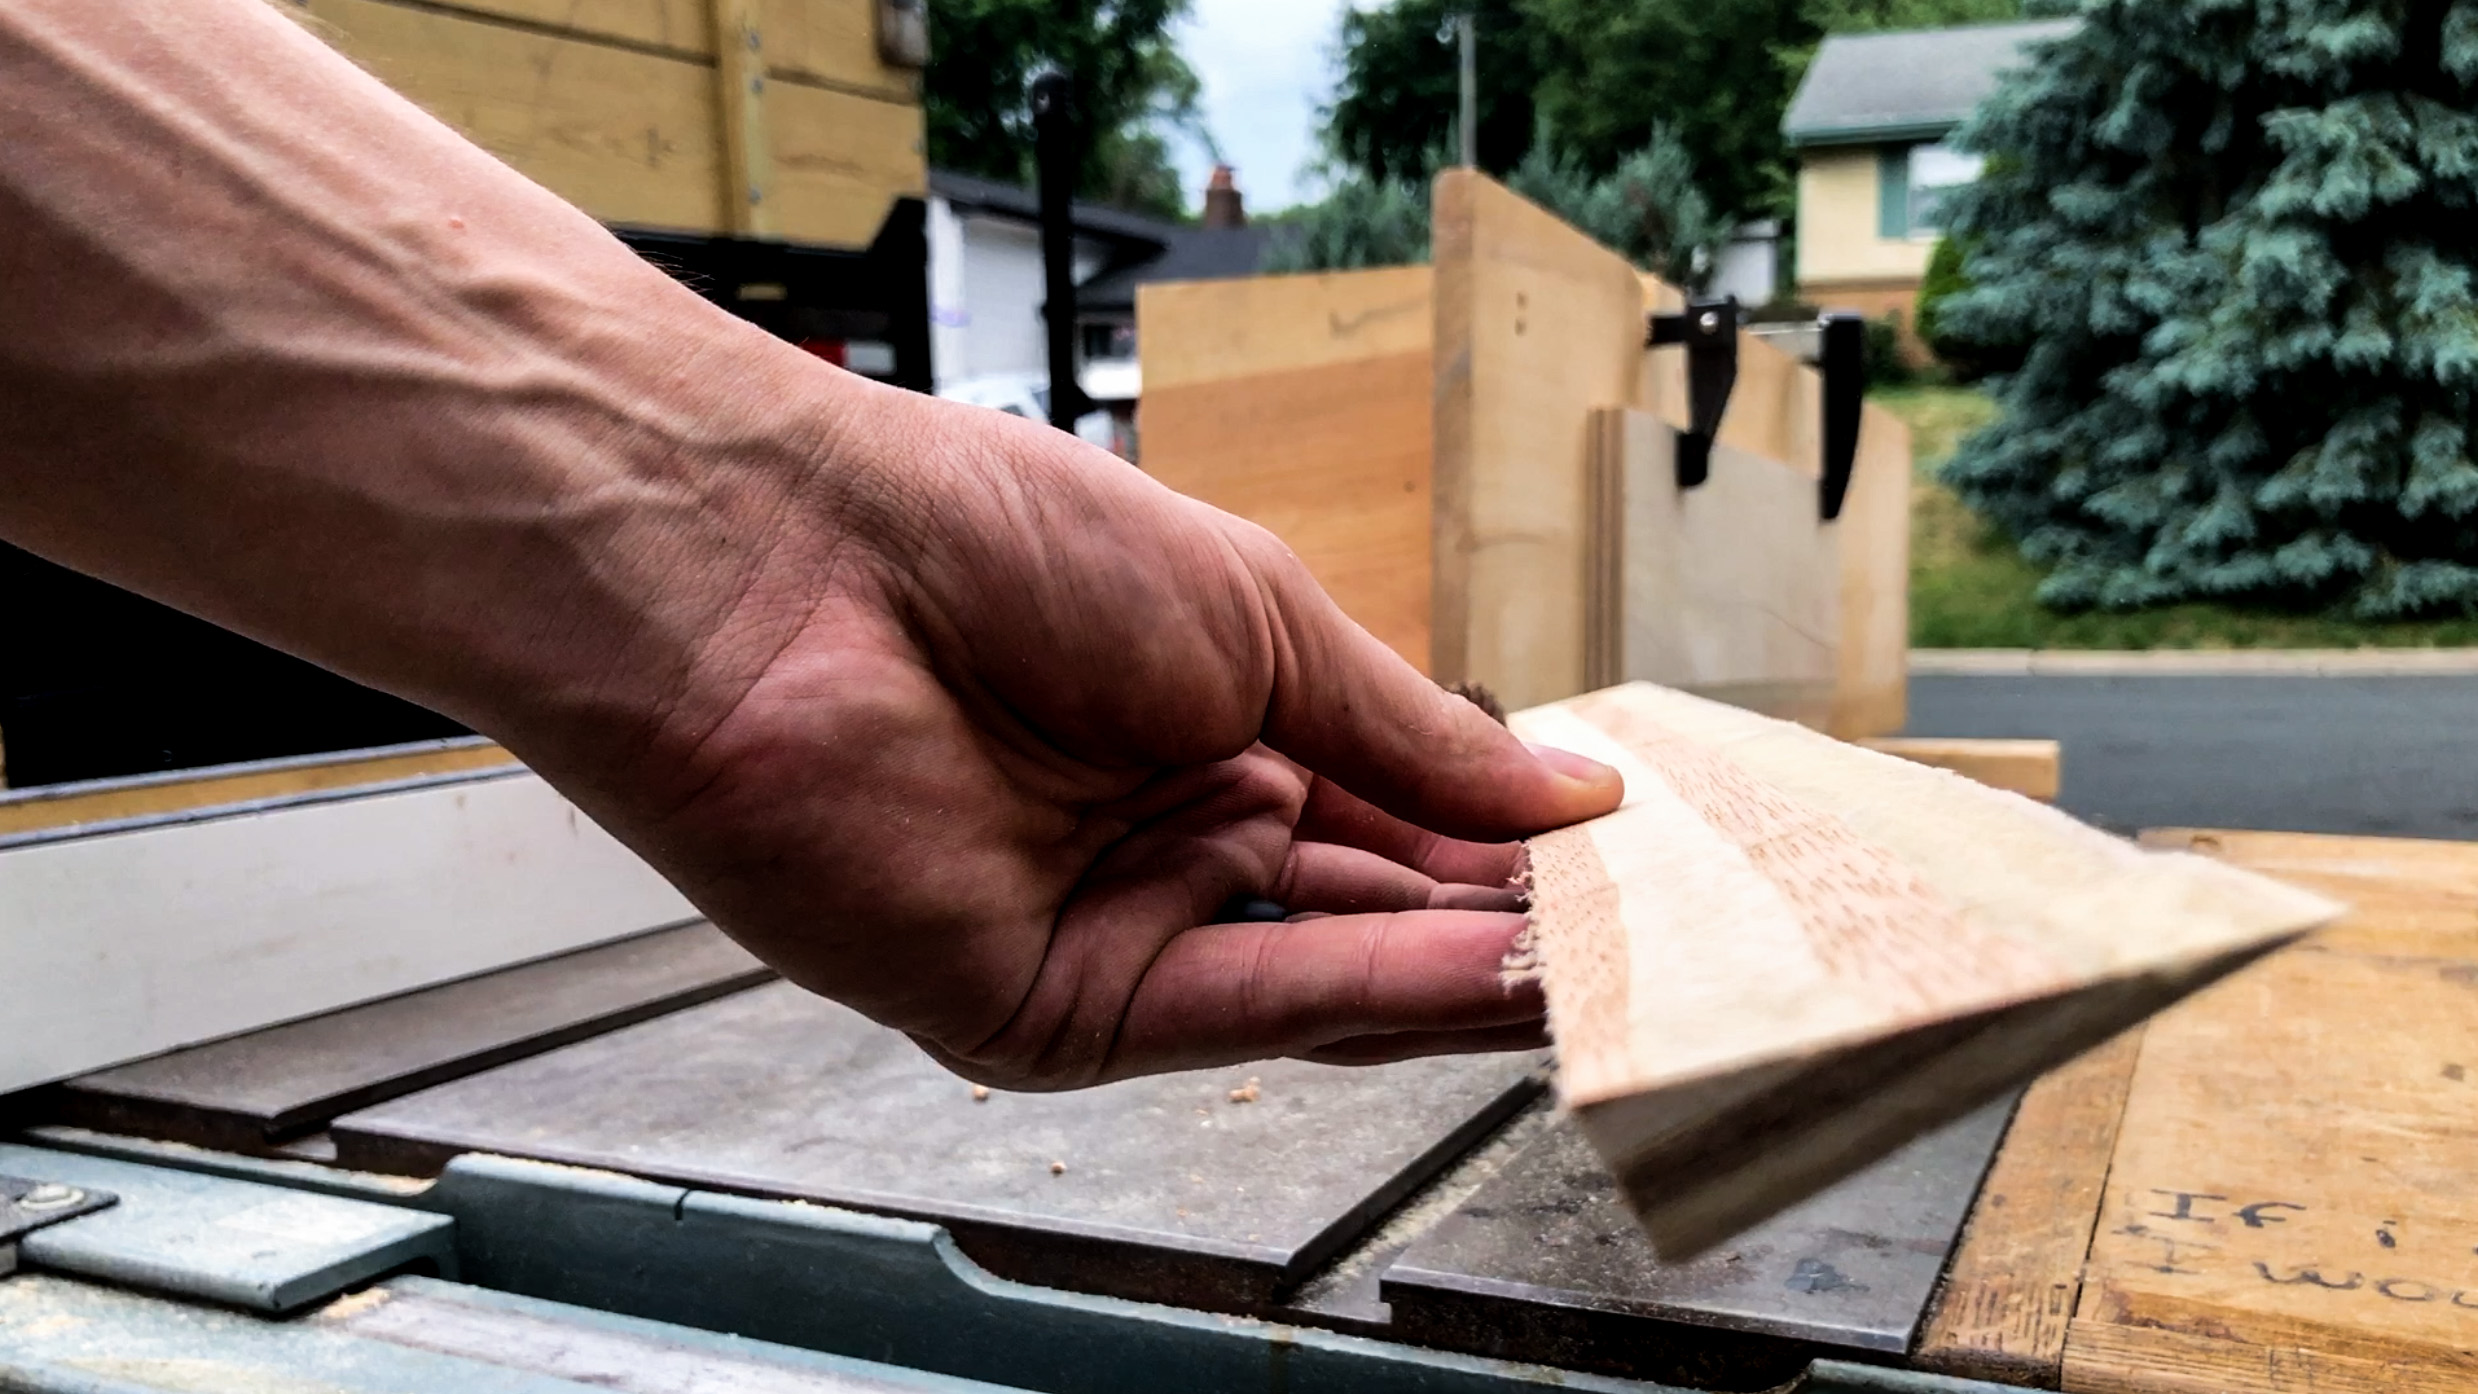
Long being a fan of the “Back Cut” I realized that could be a good option. So I tried it out with 3/4″ thick Maple plywood.

I “Back Cut” the front edge so that it was a hair under 1/8″ thick. This was good. The desk looked very thin. That was the look I was looking for.


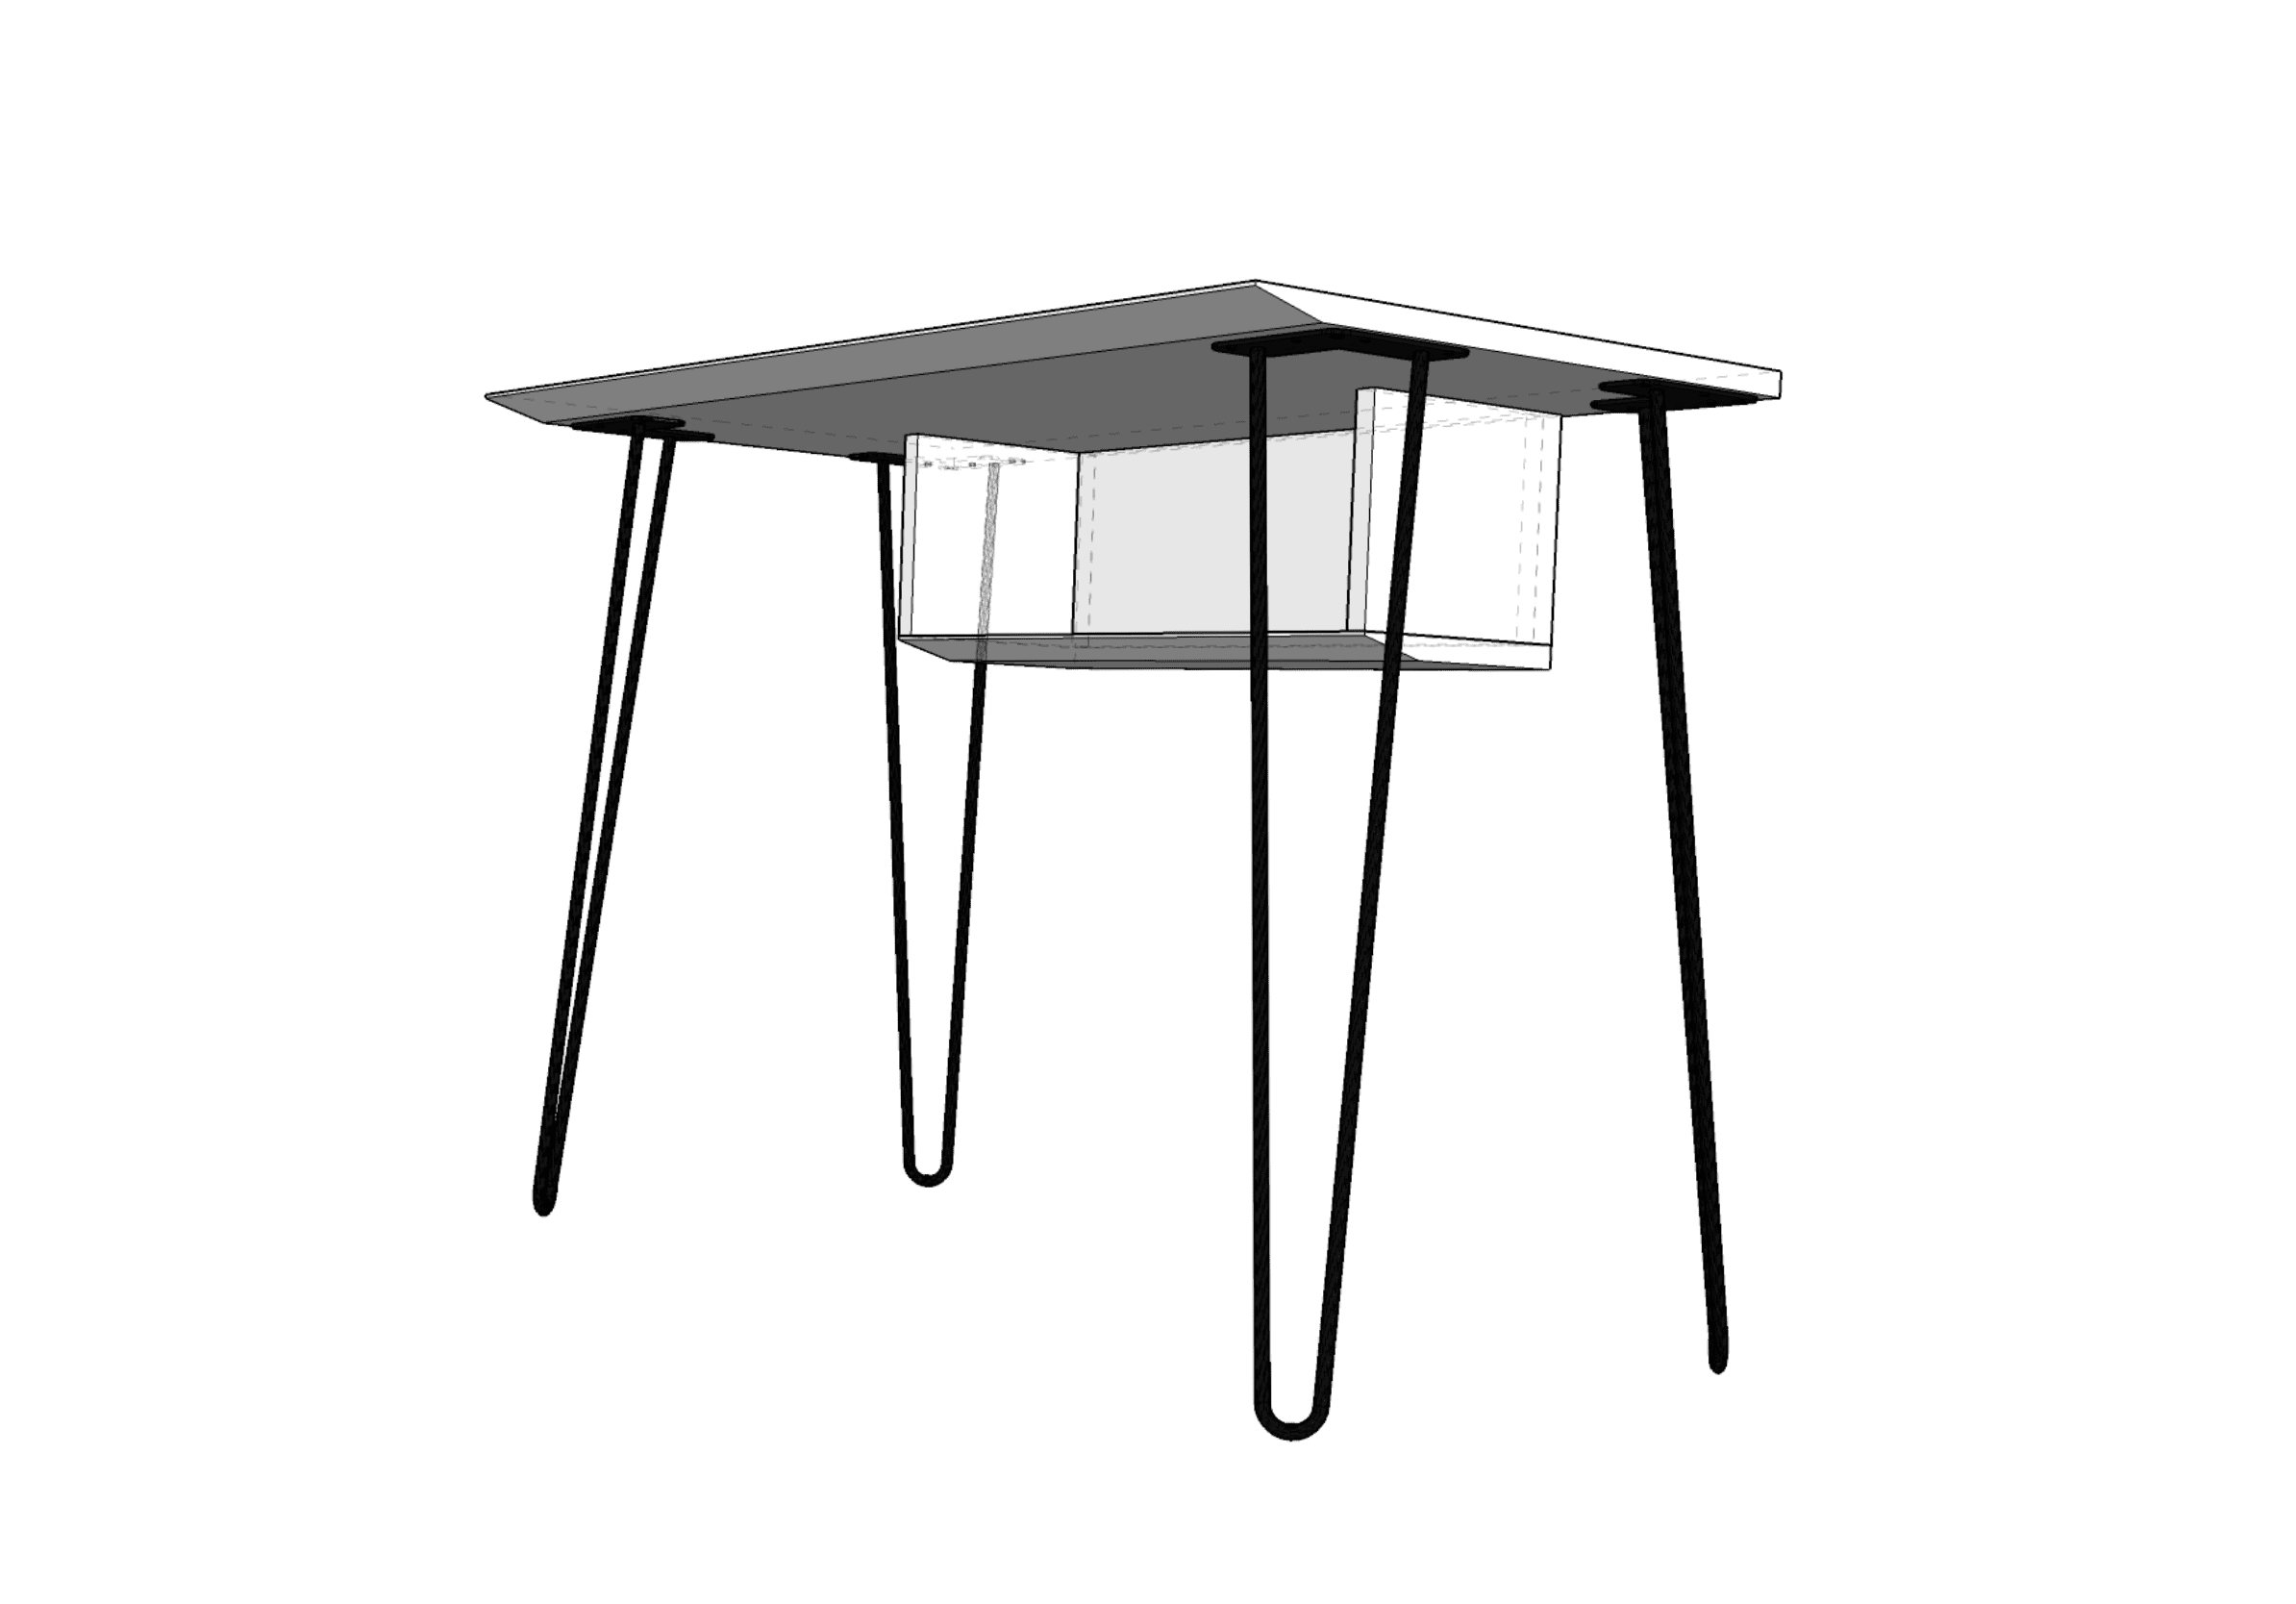
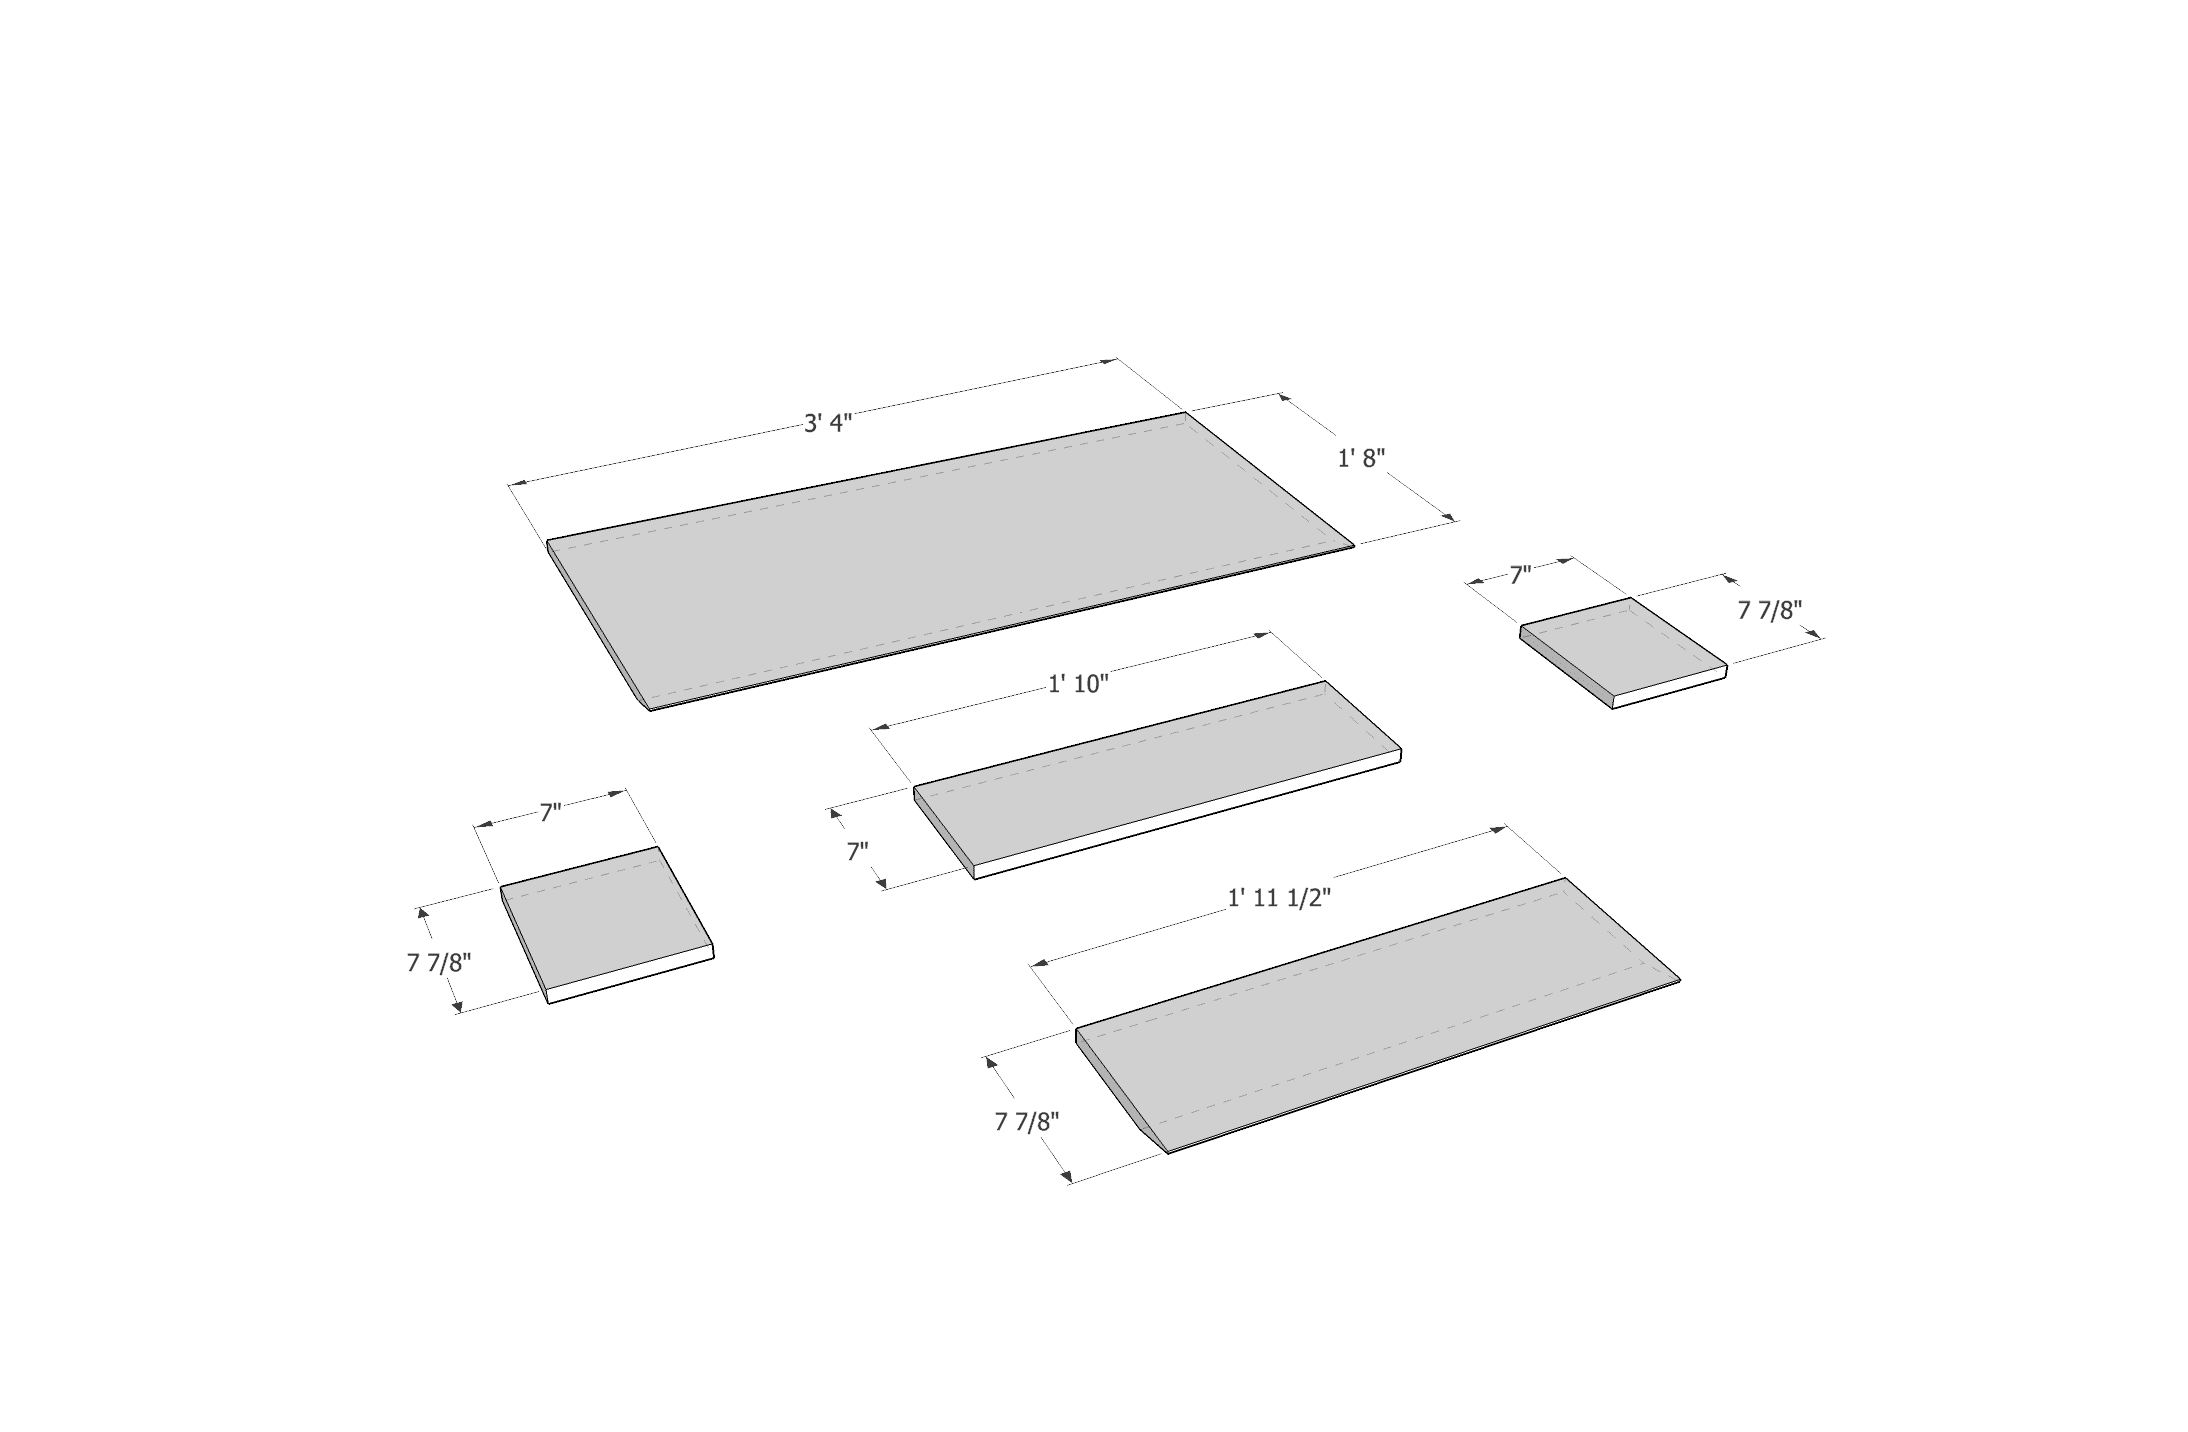
Here’s the plan.

I’ve also got the SketchUp file for you, so you can make your own modifications to the desk to fit your needs. 

What is SketchUp?

SketchUp is a 3D modeling computer program that has a lot of drawing/modeling applications like architecture, interior design, landscape architecture, civil and mechanical engineering, film and video game design and even wood working.

To download SketchUp, you can find a free version of the software here

How To Install A Nest Learning Thermostat

In this video, we’ll unbox the Nest Learning Thermostat and I’ll walk you through the install & setup. You’ll want to make sure that your existing thermostat is a low voltage (24 volts) in order for Google Nest to be compatible with your system.

Outline of this video for easy navigation:
Check Compatability: @0:23
Unboxing: @2:28
Install: @3:32
Set Up & Configuration @7:23

Link to instructions: https://nest.com/support/images/00000…

If your existing thermostat has 2 labels you’ll want to check this site for further instructions and to confirm compatibility: nest.com/2labels

Nest Learning Thermostat*- https://amzn.to/2HD3ULA
Nest Learning Thermostat Black* – https://amzn.to/32abVkD
Voltage Meter* – https://amzn.to/37Kkl3h
Wire Cutter & Stripper* – https://amzn.to/2V9oTh6 _

_________________

See What I’m Up To:
Instagram: https://www.instagram.com/mkrzesowiak/
TicTik: https://vm.tiktok.com/9tyjaL/

How To Use A Pro Foam Gun – Great Stuff Pro 14

How To Use A Pro Foam Gun – Great Stuff Pro 14

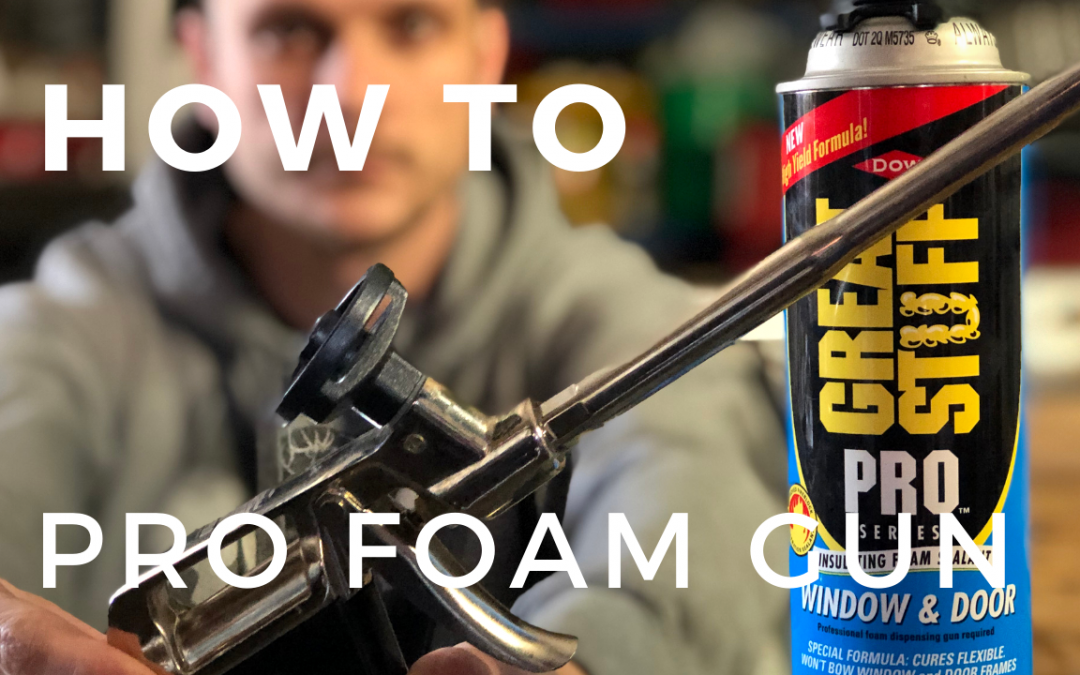
In this video, I’ll show you how to use a Pro-style foam gun and the advantages they have over using a regular “straw” style foam can. I’ll be walking you through how to use the Great Stuff Pro Foam Gun by Dow.

Outline

Here’s the outline for this video for ease of navigation and finding relevant info:
Gun Options @0:30
Why Use a ProFoam Gun @1:42
-Parts of The Gun @3:11
Things You’ll Need @3:42 (Pro Tip @4:08 and @4:43 )
How To Use A Foam Gun @5:21
1. Shake Vigorously (Wear protective gloves and eyewear)
2. Attach can to gun
3. Mist the area you want to foam with a spray bottle of water.
4. Make any adjustments to the regulator or control knob on the gun to ensure the flow rate you desire. (Test on a piece of scrap material)
5. Depress the trigger and apply the foam (in a continuous bead if possible)
6. Wipe the tip of the gun as need.
7. Mist again with water.
8. Wait for the foam to cure.
9. Once the foam has curred trim back excess foam as need.

How To Clean The Gun
1. Cleaning The Nozzle (when you leave the can of foam attached to the gun) @8:14
2. Cleaning The Gun, when you detach a can of foam. (“Longer-term” gun storage) @10:09 Troubleshooting @11:33
-What to do when your foam shrinks and doesn’t seal

In This Video


Pro 14 Foam Gun (Featured in this video*): https://amzn.to/2HoGERf
Pro 14 XL Foam Gun*: https://amzn.to/38synYv
Gaps & Cracks*: https://amzn.to/2tW5K6T
Window & Door*: https://amzn.to/37tnrZo
Wall & Floor*: https://amzn.to/2vuPwCe
Pest Block Foam*: https://amzn.to/2HoElxO
Construction Adhesive Foam*: https://amzn.to/39tvPt8
Gun and Tool Cleaner*: https://amzn.to/39tt8rw
(-12 Pack*: https://amzn.to/31RkzEs )
Spray Bottle*: https://amzn.to/37qGFi8

Plastic Tips for foam gun*: https://amzn.to/38yMNGI -I didn’t mention this in the video, but you can use these to protect the tip of your foam gun when working against an abrasive surface like concrete, brick or stone. These will lay a very small thin bead of foam. If you need a larger foam bead, simply cut off the tip for a wider diameter.

See What Else I’m Up To:
Instagram: https://www.instagram.com/mkrzesowiak/
TicTik: https://vm.tiktok.com/9tyjaL/

How to Fasten to Brick Using Tapcons and Common Mistakes to Avoid

How to Fasten to Brick Using Tapcons and Common Mistakes to Avoid

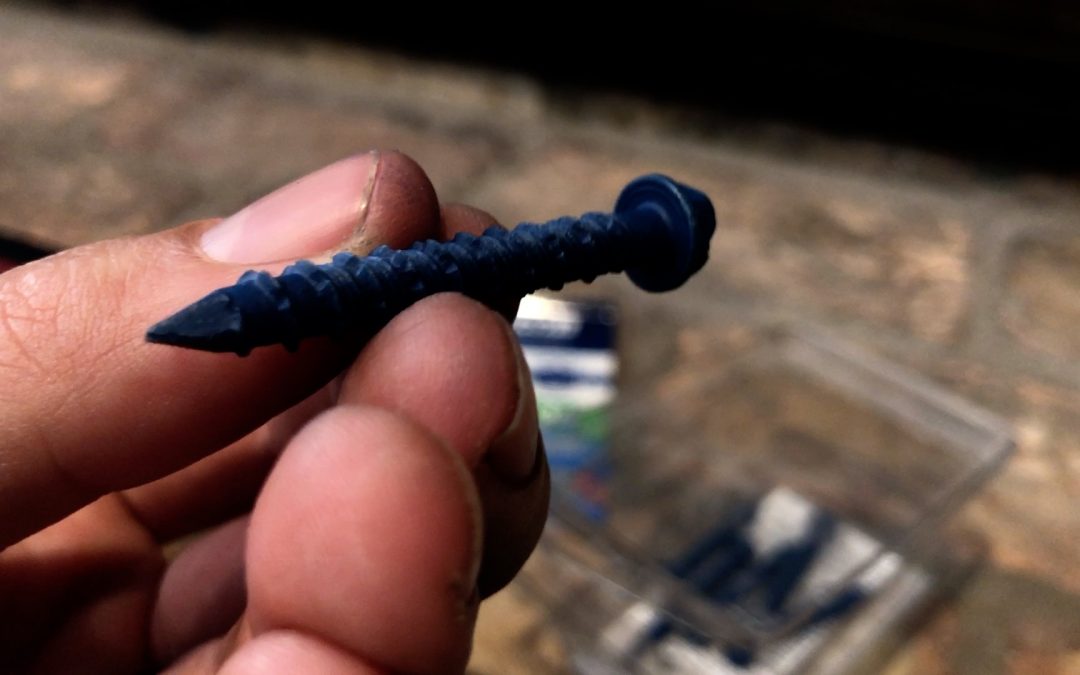
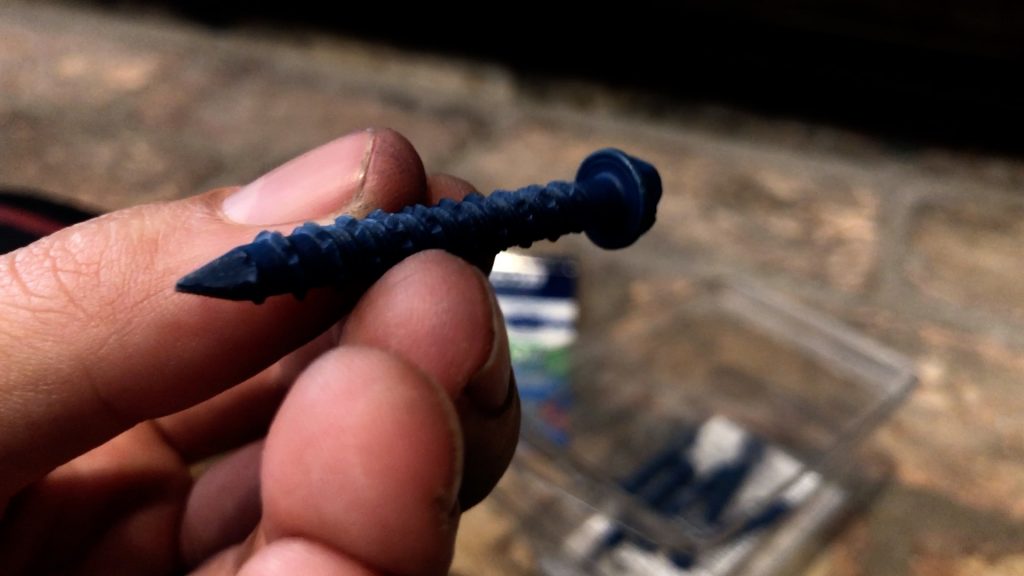
Tapcons are a great light-duty way to fasten to concrete and masonry products. They are accessible to most homeowners and DIY’ers because they are easy to use and only require having; a drill with a hammer setting, an impact driver and a masonry drill bit.

How To Fasten To Brick Using Tapcons

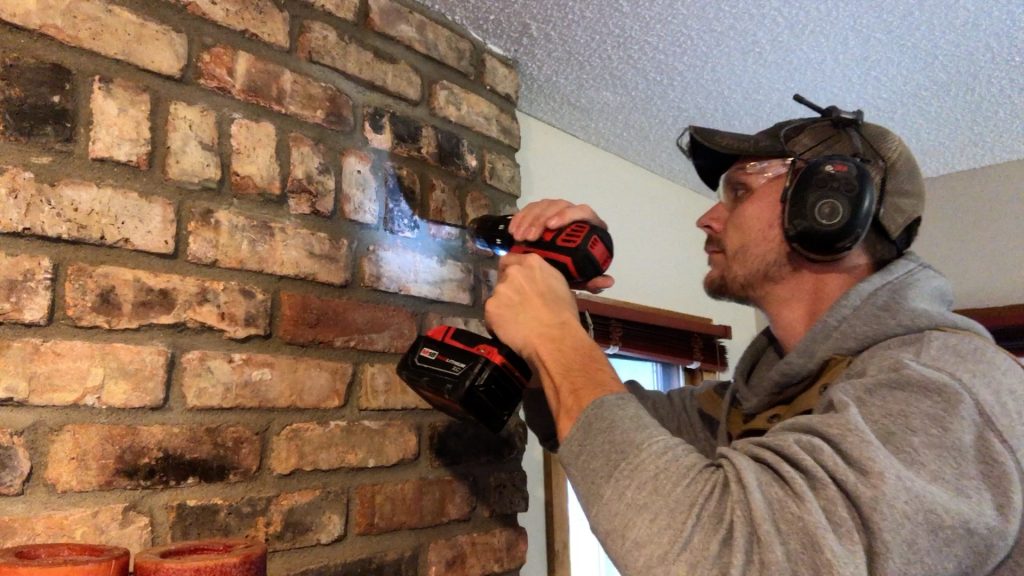
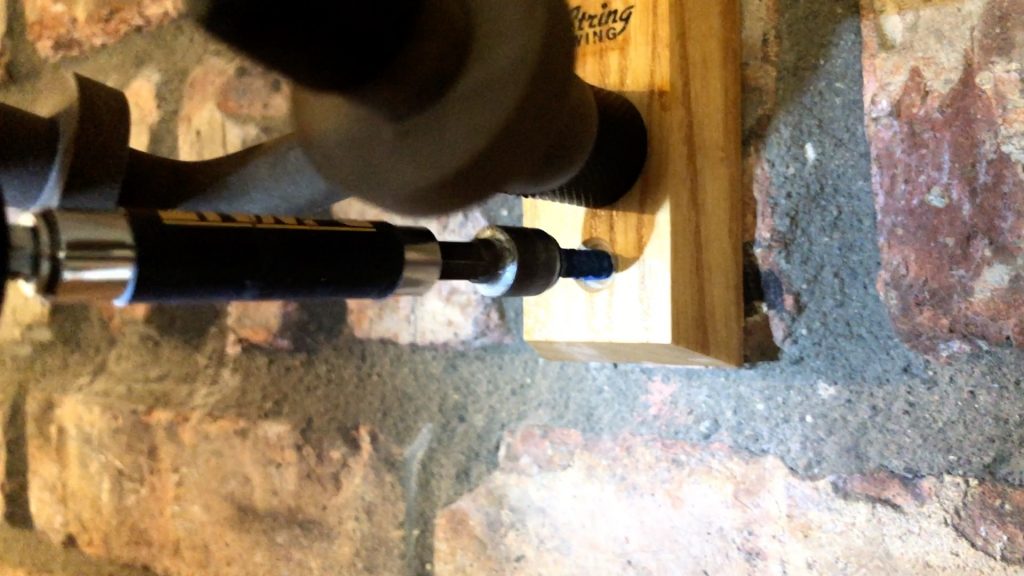
In this YouTube video, I’ll show you how to fasten a Guitar Mount to a brick fireplace and we’ll talk about some of the common mistakes to avoid when using Tapcons. You can also read the summary of the common mistakes below.

Using The Wrong Drill bit Size for The Fastener

The hole needs to be slightly smaller than the diameter of the fastener so that the threads of the Tapcon have something to grab into. If the masonry bit you use is too small you won’t be able to drive the Tapcon in at all. If the masonry bit is too large, the Tapcon will not hold.

You can find out which sized masonry bit to use by looking at the Tapcon packaging. Based on the diameter of the fastener you have, the masonry bit size will be indicated on the box.

Over Boring The Hole

This is similar to using the wrong diameter bit. When drilling out the hole for the Tapcon you will need to keep a steady hand. If you “wobble” the bit side to side as you drill you’ll effectively make the hole wider and the fastener won’t be able to hold the load.

To avoid this drill your hole at a consistent angle and stay steady. Drill quickly and use a sharp masonry bit.

Over Driving The Fastener

You want to snug the fastener up so that it holds, however, you don’t want to over-tighten it. This can be fairly easy to do when you’re using an impact driver. Over tightening/driving can result in the threads of the Tapcon being worn down as they spin against the concrete, some of the concrete will also be ground away. The result is a fastener that won’t hold, just like over boring the whole with the masonry bit.

So remember, snug it up, but don’t over tighten.

When A Tapcon Won’t Go All The Way In

This is by far the most common problem people will face when using Tapcons.

This can happen for a few reasons. Typically what happens is that as you drive the Tapcon in some of the residual concrete dust is left in the whole from drilling. This dust compacts at the bottom of the hole not allowing for the Tapcon to be driven in fully.

Here are some tips to avoid this:

  1. Drill the hole deeper than you need (ie. Deeper than the length of the Tapcon fastener). That way any residual concrete dust will have a place to go.
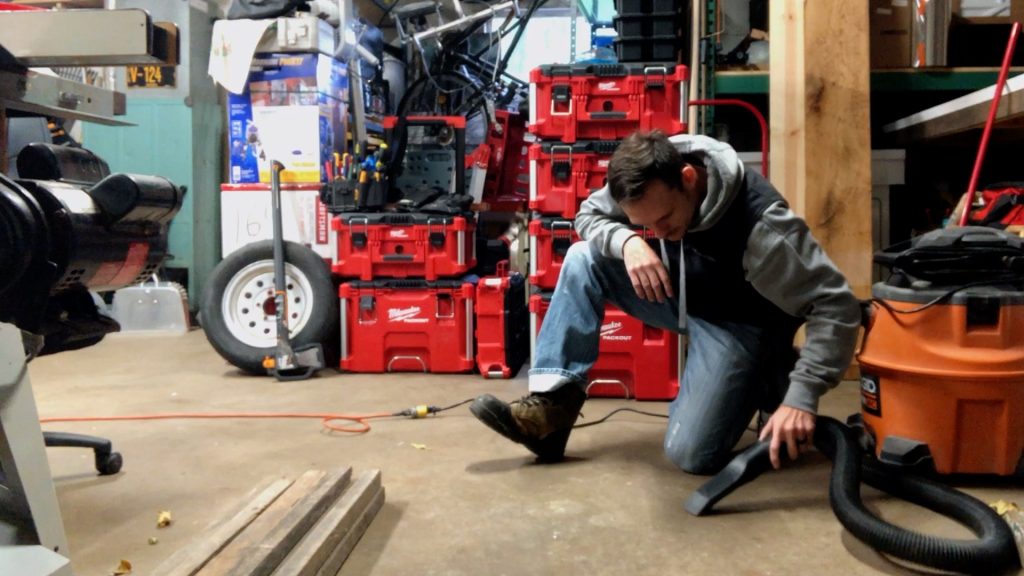
  2. Clean out the hole before driving the Tapcon in. The best way to do this is with a vacuum and/or an air compressor. I’ve found that the needle attachments for blowing up sports balls (think basketballs, footballs, etc) are pretty effective for blowing concrete dust out of the holes.

With that, may you avoid these common mistakes and may your Tapcons forever hold strong.

What Makes the Stack Effect Stronger?

What makes The Stack Effect stronger?
Short answer, a higher “Delta T’ (and other factors).

Wat the wat? A higher what?

“Delta T”

Here’s the english: “Delta T,” is used in the building sciences as shorthand (“short-speak”) for Difference in Temperature. That’s all it means.

Air is a fluid. One property of this fluid is that warmer air is more buoyant and so it rises. Cold air is denser (heavier in a sense) so it sinks. This simple principle is the driving force behind the Stack Effect. (Sometimes called, The Chimney Effect).

When is this force (The Stack Effect) more powerful? When there is a higher delta T.

For example, let’s say we have a house at 70° F. It’s a mild fall day and the outdoor temperature is 65° F outside. Our “Delta T” or Difference in temperature, is 5° F (70 – 65 = 5). The hot air is going to rise to the top (2nd story and attic) of the house and leak out. As it leaks to the outside it creates a negative pressure inside the house. Now, we have a “Delta P,” a difference in air pressure.

As that air leaves, new air needs to replace it. New air will leak in from the first floor or basement. This movement of air in and out of the house (and through the house) is driven by the air’s buoyancy. Overall this observable condition is the Stack Effect.

Let’s look at the same house a few months later in the winter. The indoor temperature is 70° F . The outdoor temperature is now 10°F. Our “Delta T” is now 60°F (70 – 10 = 60). A higher delta T means more buoyant air, this creates a greater difference in pressure (Delta P) as the force of the more buoyant(warmer) air escapes faster.

The greater the Delta T and the greater the height of a building the greater the force of buoyancy.

Just like a blustery day, the Stack Effect can move a significant amount of air through a building’s envelope. Leaky buildings consume large amounts of energy as their mechanical and ventalation systems condition (heat or cool) air that is continually exiting the building. What is special about The Stack Effect is that it works every hour of every day when there is a difference in temperature. It’s a near constant force unlike other air pressure forces in a home.

Resistance

Another factor, the size of air leaks. Said another way, if we decrease resistance our fluid (ie air) will flow from areas of high pressure to low pressure more easily. Simply put this allows for the Stack Effect to move a greater volume of air through the building envelope. Take opening a window for example. This increases the air driven by the Stack Effect because it decreases air resistance. A larger volume of air is now able to flow through the building more easily. Decreasing resistance makes the Stack Effect stronger.

In a building, this is what we don’t want. We want to keep as much of our conditioned air as we can.

All Aboard The Merry Go Round

So what happens when we put it all together? Here’s one scenario to consider:

In the winter, cold air leaking into the first floor will make people feel cool. What’s the typical response? Turn up the thermostat naturally. The heating equipment warms the air, giving it more buoyancy. It rises and leaks into the 2nd floor above.

With this extra heat upstairs the building’s occupants may get overheated and feel uncomfortable. They crack a few windows to cool off. This decreases resistance, increasing the amount of air flow leaving the building. The “Delta P” downstairs is driven up causing more cold air to leak in. People downstairs feel colder, they turn up the thermostat again.

The cycle repeats and now you’re on merry-go-round-death-spiral of trying to heat the entire county in the winter with your cute little furnace. Good luck to your futile efforts, please tell us how expensive your energy bill was when you’ve succeeded.

Air Seal. Air Seal. Air Seal.

So what can you do?

The Stack effect is why air sealing is so important in houses. Many homeowners looking to save energy (at least in a heating dominated climate) will turn to strategies like beefing up the attic insulation. While important, this NEEDS to be done with air sealing. Air sealing seals up as many gaps and cracks as we reasonably can, as effectively as we can. This adds resistance to air movement decrease the power of the stack Effecting, keeping your conditioned air exactly where you want it. Inside the building.

How To Air Seal Your Chimney Flue With A Chimney Balloon

How To Air Seal Your Chimney Flue With A Chimney Balloon

Chances are if you have a fireplace you’re losing heat through the chimney when you’re not burning the fire. Most chimneys don’t air seal well and are notoriously leaky. Or as I like to say, “Leakier than a porcupine’s water bed.”

Most fireplaces have a cast iron damper in the firebox. The dampers usually don’t seat well and allow a lot of air to get by anyways. The most effective way to seal a chimney is going to be to get up on your roof and seal the top of the chimney, this usually tends to be a little more permanent so it could be a good solution if you don’t plan on using your fireplace.

But if you plan to use the fireplace occasionally you may want a less permanent solution. An inflatable chimney balloon or bladder could be a good solution for you. They are relatively easy to install will only take you 5-10 minutes.

You can see the one I installed in my home and how I did it here:

https://youtu.be/fxHXIF2C1Bs

Here’s an example of an inflatable balloon you use to temporarily seal your chimney: https://www.amazon.com/gp/product/B000ILEIFY

How To Find Your Rear Differential Gear Ratio

How To Find Your Rear Differential Gear Ratio

Ever wonder how to find the gear ratio for your rear differential? This will help you find your gear ratio on a Ford or GMC/Chevrolet Truck.

First, you’re going to need to locate the manufacturer’s sticker on your truck with the code. Here is a video that will show you where to find that sticker:

Ford places their sticker on the driver’s side door at about thigh height. It’s visible when you open the door (usually on the door frame).

GM has a sticker placed in the glove box. If your GM vehicle doesn’t have this sticker (sometimes they don’t unfortunately) you may need to take your VIN to a dealer ask them to look it up for you.

Second, cross-check the code on your sticker with the ones listed below. This is usually a little easier on a Ford than GM. I’ve listed below all the axle codes that I am aware of for these manufacturers. Keep in mind if your rear differential has ever been modified or replaced with another, these codes may no longer represent your actual rear differential gears.

Ford Axel Codes and Their Corresponding Information

Axel Code (From Door Sticker)Axel TypeCapacity IbsRATIOYear
01 Ford 9″28002.75 
02Ford 9″28003.00 
04Ford 9″28003.25 
07Ford 9″28002.47 
12Ford38002.731991
13Ford 9″37502.751981-1983
13Ford 8.8 4.111985-1986
14Ford 9″37503.001981-1986
15Ford 9″37503.251981-1982
15Ford 3.31 
15Ford 9″37502.731983
16Ford 9″37503.50 
16Ford 3.73 
17Ford33003.251971
17Ford38003.311995 / 1999-2002 / Expedition
17Ford 3.551998
17Ford 3.731997
17Ford 9″37502.47 
18Ford 8.838003.081983-1986
19Ford 8.838003.551983-1986 / Expedition
22Dana53004.10 
23Dana 6053003.54 
24Dana 6053003.73Econoline
25Ford53004.101991
25Dana 6053003.33 
26Ford40503.55 
26  3.73F-250
27  3.31F-250
27Ford53003.73 
27Dana 7074004.10 
28Dana 7074004.56 
29Ford 10.25″53003.551991
31Dana62503.07 
31  3.73F-250 / Excursion
32Dana62504.10Econoline
32Dana 6153003.00 
33Dana 6162503.54 
33Ford 4.30F-250
34  3.73Econoline
35  4.09Econoline
35Ford62504.101991
36Dana 7074003.731980
36  4.56F-250
37Dana 6053003.54 
38Ford62503.08 
38Dana 6053003.73 
39Ford 10.2562503.551991 Econoline
41Dana62503.54 
41  3.73F-350
42Dana62503.73 
42Dana74004.10 
43Dana74003.54 
43Dana62504.10 
43  4.30F-350
44Dana62504.56 
45Ford74004.101991
46  4.56F-350
49Ford 10.2574003.551991
51Dana 70 HD 74003.73 
52Dana 70 HD74004.10Econoline
53Dana 70 HD74004.561982
53Dana 70 HD74003.541983-1986
56  4.10Econoline
61  3.73F-350
62Dana81004.10 
63Dana 82003.54 
63  4.30F-350
65Ford82504.101991
66  4.56F-350
69Ford 10.2582503.25 
69Ford82503.551991
72Dana63004.10 
72Dana110004.63 
73Dana63003.54 
73Dana110005.13 
73  4.30F-450
75  5.38F-450
78  4.88F-450
81  3.73 
81  4.63Econoline
82  4.10F-350
83  4.30F-350
86  4.56F-350
88  4.88F-350
95  5.38F-550
98  4.88F-550
B2Dana53004.10 
B3Dana53003.54 
B4Dana53003.73 
B5Dana 60 – Limited Slip53003.33 
B5Ford 10.25 – Limited Slip 4.10 
B6Ford – Limited Slip53003.55 
B6Ford – Limited Slip 3.73 
B7Ford – Limited Slip53003.73 
B9Ford 10.25 – Limited Slip 3.55 
C1Ford – Limited Slip 3.73F-250 / Excursion
C2Dana 61 – Limited Slip53003.00 
C2Dana 61 – Limited Slip53003.54 
C2Dana – Limited Slip62504.10F-250 / Excursion
C3Dana Limited Slip62503.54 
C3Ford – Limited Slip 4.30F-250 / Excursion
C5Ford 10.25 – Limited Slip 4.10 
C6Ford – Limited Slip 4.56F-250
C7Dana 60 – Limited Slip53003.54 
C9Ford 10.25 – Limited Slip 3.55 
D1Limited Slip 3.73F-350
D2Limited Slip74004.10 
D3Ford Limited Slip 3.54 
D3Dana – Limited Slip62504.10 
D3  4.30F-350
D5Ford 10.25 – Limited Slip74004.10 
D6Limited Slip 4.56F-350
D7Dana 70 – Limited Slip53004.10 
E1Ford – Limited Slip 3.73 
E2Dana 70 HD – Limited Slip74004.10 
E3Limited Slip 4.30F-350

2004 Ford Super Duty Axle Codes:

31 — 3.73 non-limited slip, F-250/Excursion
32 — 4.10 non-limited slip, F-250
41 — 3.73 non-limited slip, F-350
61 — 3.73 non-limited slip, F-350
73 — 4.30 non-limited slip, F-450
75 — 5.38 non-limited slip, F-450
78 — 4.88 non-limited slip, F-450
81 — 3.73 non-limited slip, F-350
88 — 4.88 non-limited slip, F-350
95 — 5.38 non-limited slip, F-550
98 — 4.88 non-limited slip, F-550
C1 — 3.73 limited slip, F-250/Excursion
C2 — 4.10 limited slip, F-250/Excursion
C3 — 4.30 limited slip, F-250/Excursion
D1 — 3.73 limited slip, F-350
D2 — 4.10 limited slip, F-350
D3 — 4.30 limited slip, F-350
E2 — 4.10 limited slip, F-350
E3 — 4.30 limited slip, F-350
EW — 4.10 limited slip, F-350 (ambulance package)
F1 — 3.73 limited slip, F-350
F2 — 4.10 limited slip, F-350
F6 — 4.56 limited slip, F-350
G3 — 4.30 limited slip, F-450
G5 — 5.38 limited slip, F-450
G8 — 4.88 limited slip, F-450
GW — 4.88 non-limited slip, F-450
K5 — 5.38 limited slip, F-550
K8 — 4.88 limited slip, F-550
KW — 4.10 non-limited slip, F-550

2007 Ford Super Duty Axle Codes:

37 — 3.73 non-limited slip
3L — 3.73 limited slip
41 — 4.10 non-limited slip
43 — 4.30 non-limited slip
48 — 4.88 non-limited slip
4L — 4.30 limited slip
4N — 4.10 limited slip
4W — 4.10 limited slip (ambulance package)
53 — 5.38 non-limited slip
5L — 5.38 limited slip
8L — 4.88 limited slip

2008 Ford Super Duty Axle Codes:

35 = 3.55 non-limited slip
3J = 3.55 limited slip
37 = 3.73 non-limited slip
3L = 3.73 limited slip
4L = 4.30 limited slip
4N = 4.10 limited slip

But wait…. there’s more. Here’s another chart. Brace yourself.

Axle CodePositractionRatio
005-JLimited Slip Differential 3.27
12Conventional non-Positraction Differential2.73
16Conventional non-Positraction Differential3.73
17Conventional non-Positraction Differential3.31
18Conventional non-Positraction Differential3.06
19Conventional non-Positraction Differential3.55
23Conventional non-Positraction Differential3.54
24Conventional non-Positraction Differential3.54
25Conventional non-Positraction Differential4.10
026-FConventional non-Positraction Differential 2.73
29Conventional non-Positraction Differential3.55
31Conventional non-Positraction Differential3.73
32Conventional non-Positraction Differential4.10
33 (1992-1998)Conventional non-Positraction Differential3.54
33 (1999-2002)Conventional non-Positraction Differential4.30
34Conventional non-Positraction Differential3.73
35Conventional non-Positraction Differential4.10
36Conventional non-Positraction Differential4.56
39Conventional non-Positraction Differential3.55
040-LConventional non-Positraction Differential 3.08
41Conventional non-Positraction Differential3.73
42Conventional non-Positraction Differential4.10
43Conventional non-Positraction Differential4.30
45Conventional non-Positraction Differential4.10
46Conventional non-Positraction Differential4.56
49Conventional non-Positraction Differential3.55
52Conventional non-Positraction Differential4.10
054-JConventional non-Positraction Differential 3.27
56Conventional non-Positraction Differential4.10
58Conventional non-Positraction Differential4.86
61Conventional non-Positraction Differential3.73
62Conventional non-Positraction Differential4.10
63Conventional non-Positraction Differential4.30
65Conventional non-Positraction Differential4.10
66Conventional non-Positraction Differential4.56
68Conventional non-Positraction Differential4.88
69Conventional non-Positraction Differential3.55
72Conventional non-Positraction Differential4.63
73 (1996-2000)Conventional non-Positraction Differential5.13
73 (2002)Conventional non-Positraction Differential4.30
75 (2002 Motor home – Dana 80)Conventional non-Positraction DifferentialSupply Bill of Material Number
75Conventional non-Positraction Differential5.38
78Conventional non-Positraction Differential4.88
81Conventional non-Positraction Differential3.73
82Conventional non-Positraction Differential4.10
83Conventional non-Positraction Differential4.30
86Conventional non-Positraction Differential4.56
88Conventional non-Positraction Differential4.88
95 (2002 Motor home – Dana 135)Conventional non-Positraction DifferentialSupply Bill of Material Number
95Conventional non-Positraction Differential5.38
98Conventional non-Positraction Differential4.88
102-AConventional non-Positraction Differential 3.31
113-ALimited Slip Differential 3.73
114-AConventional non-Positraction Differential 3.73
126-NConventional non-Positraction Differential 3.55
127-NLimited Slip Differential 3.55
130-NConventional non-Positraction Differential 4.10
131-NLimited Slip Differential 4.10
168-S Conventional non-Positraction Differential 4.10
169-SLimited Slip Differential 4.10
189-SConventional non-Positraction Differential 4.10
192-SLimited Slip Differential 4.10
199-RLimited Slip Differential 4.10
203-BLimited Slip Differential 2.73
209-ELimited Slip Differential 3.27
221-CLimited Slip Differential 2.73
223-CLimited Slip Differential 2.73
225-CLimited Slip Differential 3.08
227-CLimited Slip Differential 3.08
229-CLimited Slip Differential 3.27
231-CLimited Slip Differential 3.27
262-CConventional non-Positraction Differential 2.73
264-CConventional non-Positraction Differential 2.73
348FConventional non-Positraction Differential 3.27
350-FConventional non-Positraction Differential 3.08
352-FConventional non-Positraction Differential 3.08
354-FConventional non-Positraction Differential 3.73
355-FLimited Slip Differential 3.55
356-FConventional non-Positraction Differential 3.27
357-FLimited Slip Differential 3.55
359-FLimited Slip Differential 3.73
362-FConventional non-Positraction Differential 3.45
363-FLimited Slip Differential3.73
366-FConventional non-Positraction Differential3.45
367-FLimited Slip Differential3.73
368-FConventional non-Positraction Differential3.73
370-FConventional non-Positraction Differential 3.73
371-FLimited Slip Differential 4.10
372-FConventional non-Positraction Differential 4.10
374-FConventional non-Positraction Differential 4.10
430-FConventional non-Positraction Differential 3.07
434-FConventional non-Positraction Differential 3.27
501-FLimited Slip Differential 3.27
502-FConventional non-Positraction Differential 3.27
511-FLimited Slip Differential  3.27
515-FConventional non-Positraction Differential  3.27
610-BConventional non-Positraction Differential 3.27
612-BConventional non-Positraction Differential 3.55
613-BLimited Slip Differential 3.73
614-BConventional non-Positraction Differential 3.73
615-CLimited Slip Differential 4.10
616-BConventional non-Positraction Differential 4.10
619-ALimited Slip Differential 3.37
621-ALimited Slip Differential 3.73
625-ALimited Slip Differential 3.27
668-HConventional non-Positraction Differential 4.10
674-FConventional non-Positraction Differential 3.55
675-FLimited Slip Differential 3.55
696-HConventional non-Positraction Differential 3.73
697-HLimited Slip Differential 3.73
699-HLimited Slip Differential 4.10
710-AConventional non-Positraction Differential 3.55
711-ALimited Slip Differential 3.55
740-PConventional non-Positraction Differential 3.31
746-AConventional non-Positraction Differential 3.55
747-ALimited Slip Differential 3.55
802-CConventional non-Positraction Differential 3.31
820-CConventional non-Positraction Differential 3.55
821-CLimited Slip Differential 3.31
825-CLimited Slip Differential 3.55
832-JConventional non-Positraction Differential 3.31
833-JLimited Slip Differential 3.31
835-JLimited Slip Differential 3.08
845-MLimited Slip Differential 4.10
852-AConventional non-Positraction Differential 3.08
862-BConventional non-Positraction Differential 3.55
869BLimited Slip Differential 3.55
900-AConventional non-Positraction Differential 3.08
908-AConventional non-Positraction Differential 3.55
909-ALimited Slip Differential 3.55
930-AConventional non-Positraction Differential 3.31
935-CLimited Slip Differential 3.73
947FConventional non-Positraction Differential 4.63
948FConventional non-Positraction Differential 5.13
950-AConventional non-Positraction Differential 3.08
954-AConventional non-Positraction Differential 3.31
956-AConventional non-Positraction Differential 3.55
958-AConventional non-Positraction Differential 3.73
B4Limited Slip Differential3.73
B5Limited Slip Differential4.10
B9Limited Slip Differential3.55
C1Limited Slip Differential3.73
C2Limited Slip Differential4.10
C3 (1992-1998)Limited Slip Differential3.54
C3 (1999-2002)Limited Slip Differential4.30
C4Limited Slip Differential3.73
C5Limited Slip Differential4.10
C6Limited Slip Differential4.56
C9Limited Slip Differential3.55
D1Limited Slip Differential3.73
D2Limited Slip Differential4.10
D3Limited Slip Differential4.30
D5Limited Slip Differential4.10
D6Limited Slip Differential4.56
D403AConventional non-Positraction Differential 3.54
D404AConventional non-Positraction Differential 3.73
D454ALimited Slip Differential 3.73
D607AConventional non-Positraction Differential 4.10
D615JConventional non-Positraction Differential 4.09
D630JConventional non-Positraction Differential 3.54
D631AConventional non-Positraction Differential 4.10
D632AConventional non-Positraction Differential 3.73
D654ALimited Slip Differential 3.54
D808ALimited Slip Differential 4.10
E1Limited Slip Differential3.73
E2Limited Slip Differential4.10
E3Limited Slip Differential4.30
E6 (1992-1998)Limited Slip Differential4.10
E6 (1999-2002)Limited Slip Differential4.56
EW (1992-1999)Limited Slip Differential4.10
EW (2000-2002)Limited Slip Differential4.88
F1Limited Slip Differential3.73
F2Limited Slip Differential4.10
F3Limited Slip Differential4.30
F5Limited Slip Differential4.10
F6Limited Slip Differential4.56
F8Limited Slip Differential4.88
G3Limited Slip Differential4.30
G5Limited Slip Differential5.38
G8Limited Slip Differential4.88
GWLimited Slip Differential4.10
H5Limited Slip Differential4.10
H7Limited Slip Differential3.31
H8Limited Slip Differential3.08
H9Limited Slip Differential3.55
K5Limited Slip Differential5.38
K8Limited Slip Differential4.88
KWLimited Slip Differential4.10
W5Limited Slip Differential4.00

Thanks Ford. For all that code.

GMC / Chevrolet Axel Codes

RPO is the acronym for “Regular Production Option.” I’ve included some GM codes for front axels too, just in case you need it.

RPO CodeTypeRatio
F16Transaxle Final Drive2.53
F17Transaxle Final Drive2.84
F18Transaxle Final Drive2.65
F25Transaxle Final Drive3.32
F29Transaxle Final Drive2.82
F36Axle Front2.19
F45Axle Front2.93
F47Axle Front2.73
F57Axle Front3.15
F62Transaxle Final Drive2.39
F67Transaxle Final Drive3.19
F68Transaxle Final Drive3.45
F75Transaxle Final Drive3.18
F77Transaxle Final Drive3.73
F79Transaxle Final Drive2.97
F82Transaxle Final Drive3.23
F83Transaxle Final Drive3.05
F90Axle Front2.73
FA0Rear5.77
FA1Rear 2 Speed4.88/6.94
FA2Rear 2 Speed4.88/6.94
FH5Transaxle Final Drive2.81
FH6Axle Front3.64
FH7Transaxle Final Drive4.12
FH8Axle Front2.40
FH9Transaxle Final Drive2.60
FJ1Axle Front4.18
FJ2Axle Front3.74
FJ3Transaxle Final Drive3.35
FJ4Axle Front4.53
FJ5Axle Front4.19
FJ7Axle Front4.56
FP0Transaxle Final Drive2.55
FP1Transaxle Final Drive2.72
FP2Transaxle Final Drive3.58
FP3Transaxle Final Drive2.73
FP4Transaxle Final Drive2.69
FP5Transaxle Final Drive2.95
FP6Transaxle Final Drive3.54
FP7Transaxle Final Drive3.73
FP8Transaxle Final Drive3.54
FP9Transaxle Final Drive3.54
FQ2Transaxle Final Drive3.48
FQ3Transaxle Final Drive2.86
FQ4Transaxle Final Drive3.57
FQ6Transaxle Final Drive4.12
FQ8Transaxle Final Drive2.96
FQ9Transaxle Final Drive3.21
FR2Transaxle Final Drive2.93
FR3Transaxle Final Drive3.69
FR6Transaxle Final Drive3.84
FR7Transaxle Final Drive3.95
FR8Axle Front4.17
FR9Transaxle Final Drive3.29
FV0Transaxle Final Drive3.67
FV1Transaxle Final Drive3.72
FV2Transaxle Final Drive4.18
FV3Transaxle Final Drive3.11
FV4Transaxle Final Drive3.71
FV5Transaxle Final Drive4.19
FV6Transaxle Final Drive4.24
FV7Transaxle Final Drive4.29
FV8Transaxle Final Drive4.31
FV9Transaxle Final Drive4.53
FVOTransaxle Final Drive3.67
FW2Transaxle Final Drive3.06
FW3Transaxle Final Drive4.02
FW4Transaxle Final Drive3.89
FW5Transaxle Final Drive4.10
FW6Transaxle Final Drive3.42
FW7Transaxle Final Drive3.83
FW8Transaxle Final Drive4.28
FW9Transaxle Final Drive3.43
FWSTransaxle Final Drive4.10
FX1Transaxle Final Drive3.94
FX2Transaxle Final Drive2.66
FX4Transaxle Final Drive3.35
FX8Transaxle Final Drive3.61
FY1Transaxle Final Drive2.36
FY3Transaxle Final Drive3.79
FY5Transaxle Final Drive3.52
G11Transaxle Final Drive2.56
G44Axle Rear3.07
G72Axle Rear2.14
G75Axle Rear3.62
G76Positraction Rear 
G80Axle Positraction, Limited Slip
G81Positraction Rear Axle 
G82Axle Rear4.56
G84Axle Rear4.10
G86Axle Rear, Limited Slip
G87Ring Gear, 8.5″ 
G89Ring Gear, 7.5″
G90Rear3.15
G91Special Highway Rear Axle3.08
G94Axle Rear3.31
G96Axle Rear3.55
G97Axle Rear2.73
GH0Axle Rear3.54
GH2Axle Rear2.29
GH3Axle Rear2.77
GH4Axle Rear2.92
GH7Axle Rear2.73
GJ1Axle Rear5.38
GJ2Axle Rear5.13
GK7Axle Rear4.78
GK8Axle Rear4.33
GK9Axle Rear4.63
GL0Axle Rear5.13
GL3Axle Rear6.17
GM1Axle Rear2.59
GM2Axle Rear3.44
GM3Axle Rear3.45
GM4Axle Rear3.67
GM5Axle Rear3.89
GM6Axle Rear4.22
GM7Axle Rear3.68
GM8Axle Rear2.56
GN9Axle Rear4.11
GS1Axle Rear2.73
GS3Axle Rear3.73
GS4Axle Rear3.70
GS5Axle Rear4.11
GS6Axle Rear4.56
GS8Axle Rear3.94
GT1Axle Rear2.56
GT2Axle Rear2.29
GT4Axle Rear (Dup of 5X1)3.73
GT5Axle Rear (Dup of GT8)4.10
GT7Axle Rear3.33
GT8Axle Rear (Dup of GT5)4.10
GU1Axle Rear2.41
GU2Axle Rear2.73
GU3Axle Rear2.93
GU4Axle Rear3.08
GU5Axle Rear3.23
GU6Axle Rear3.42
GU7Axle Rear2.77
GU8Axle Rear3.90
GU9Axle Rear3.91
GV0Axle Rear3.55
GV1Axle Rear2.73
GV2Axle Rear5.83
GV3Axle Rear3.08
GV4Axle Rear3.36
GV5Axle Rear3.55
GV7Axle Rear4.11
GV8Axle Rear2.72
GV9Axle Rear4.25
GW2Axle Rear2.56
GW3Axle Rear2.56
GW4Axle Rear3.31
GW5Axle Rear2.73
GW6Axle Rear3.27
GW8Axle Rear4.10
GW9Axle Rear (Dup of GU3)2.93
GX1Axle Rear3.70
GX2Axle Rear3.07
GX3Transaxle Final Drive3.33
GX4Axle Rear3.75
GX5Axle Rear4.09
GX6Axle Rear3.53
GX8Transaxle Final Drive3.74
GY2Axle Rear3.31
GY3Transaxle Final Drive4.29
GY4Axle Rear4.53
GY5Axle Front3.65
GY7Transaxle Final Drive4.18
GY9Axle Rear4.31
GYSTransaxle Final Drive3.65
H01Axle Rear3.07
H04Axle Rear, Single Speed4.11
H05Axle Rear3.73
H12Axle Rear, 21000 Lbs, Eaton 21065S, Single Speed
H42Axle Rear6.17
H43Axle Rear5.43
HA3Axle Rear, Single Speed5.29
HC4Axle Rear4.56
HC7Axle Rear, 7500 Lbs, Single Speed2.38
HC8Axle Rear, Single Speed, Truck3.21
HC9Axle Rear5.13
HE3Axle Rear, 3500 Lbs, Single Speed3.07
HE4Axle Rear3.40
HF7Axle Rear, 10000 Lbs, Dana 70, Single4.56
HF8Axle Rear4.88
HJ1Axle Rear4.55
HJ2Axle Rear5.86
HJ3Axle Rear4.75
HJ4Axle Rear6.50
HJ5Axle Rear5.57
HJ6Axle Rear4.78
HJ7Axle Rear4.88
HK1Axle Rear2.87
HK3Axle Rear6.14
HK9Axle Rear 10000 Lbs, Single Spd5.86
HO4Axle Rear4.11
HO6Axle Rear4.63

There you have a lot of rear differential axle codes. Hopefully the code you’re looking for it listed above… or it might really grind your gears. Pun intended.

Dodge or Chrysler… sorry, I got nothing for you.

Diffusion

Diffusion

In physics, Diffusion is the net movement of molecules or atoms from an area of higher concentration to an area of lower concentration.

In the building industry and building sciences, we most often use the concept of Diffusion to understand and/or anticipate how water will move through a material or an assembly of materials. Water, often in the physical form of water vapor.